 |
| other than the ugly computer chair, I love everything in this picture! |
Let's step back to October 2018.
I was more than tired of computers being all over the dining table, so I decided to build a desk where they could live. But first I needed to find or make space for it. Part of why I sold the buffet was to make room for a desk. Once the buffet was out of the way, I sorted through our wood stash for some of the wood and bought the rest of what I needed.
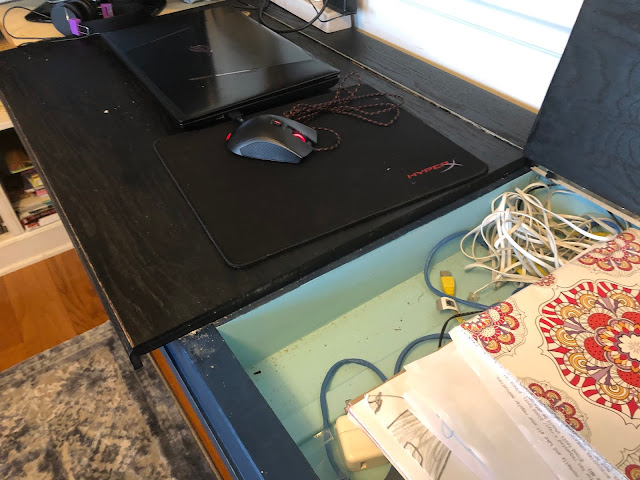
I used a combination of this pattern and this pattern. The first desk was what I was initially going for, but we wanted a space in the desk to store the computers. I thought about putting in drawers, but decided a lift top would be quicker and easier, and I'm all about quicker and easier right now. I got the lift top from the coffee table (the second link above). I ultimately decided to switch out the legs for a simple 2x4 leg with braces. Fewer cuts and a lot less time, which was the real impetus for the decision. If I wasn't doing it on a budget, I'd have ordered some legs like I used for the dining table, but the 2x4s are solid and sturdy and do the job while being inexpensive.
After cutting the frame pieces during the day, I threw the frame together that night. It turned out I didn't have long enough screws, but I used what I had. I always intended to take it back apart to sand all the wood, so not having the right screws wasn't as big an issue as it could have been.
After living with the frame in the living room for several days and deciding it was a good size, I took the frame apart, labeling each piece as I went. We'd had cold rainy weather lately, but we had a warmer day in the forecast, so I took advantage of that to sand all the 2x4s before putting them back together with the correct length screws.
I built the desk box from salvaged wood from shelves pulled out of Sunshine's room. Though I did have to buy a sheet of oak plywood for the top, as well as an oak board for the hinges to attach to.
I've used a piano hinge before, but I remembered why I dislike them. They're a pain to install properly.
I painted the legs the same color I used on the boys' beds, but it took me awhile to get around to staining the top. When I did, I stained it black, in an effort to hide the inevitable dirt and grunge that I knew would collect.
I don't have a good picture of the desk in the living room, but this screenshot from a video shows where it sat behind the couch. Here you can see the shelf I added for the extra monitor that Jeremy uses on occasion. It was sitting on top of the desk, but then you couldn't lift the top to get at anything inside. Moving the monitor restores that accessibility.
The desk was blocking the door to the back deck and it was becoming really annoying to try to squeeze past whoever was sitting in the chair while trying to go out that door. Moving it to the library has improved traffic flow so much in front of the back deck door. I'm also very pleased that it just fits in the space available on this wall.
Right now the inside compartments of the desk need to be cleared out, but they hold a surprising amount of stuff. I have hinge arms I still need to attach to keep the desk tops from banging down, but it hasn't been a priority yet.
The desk is wide enough that two people can work at it or one person can spread out with plenty of space.


No comments:
Post a Comment