Friday, February 27, 2015

Ironwork Wall Art


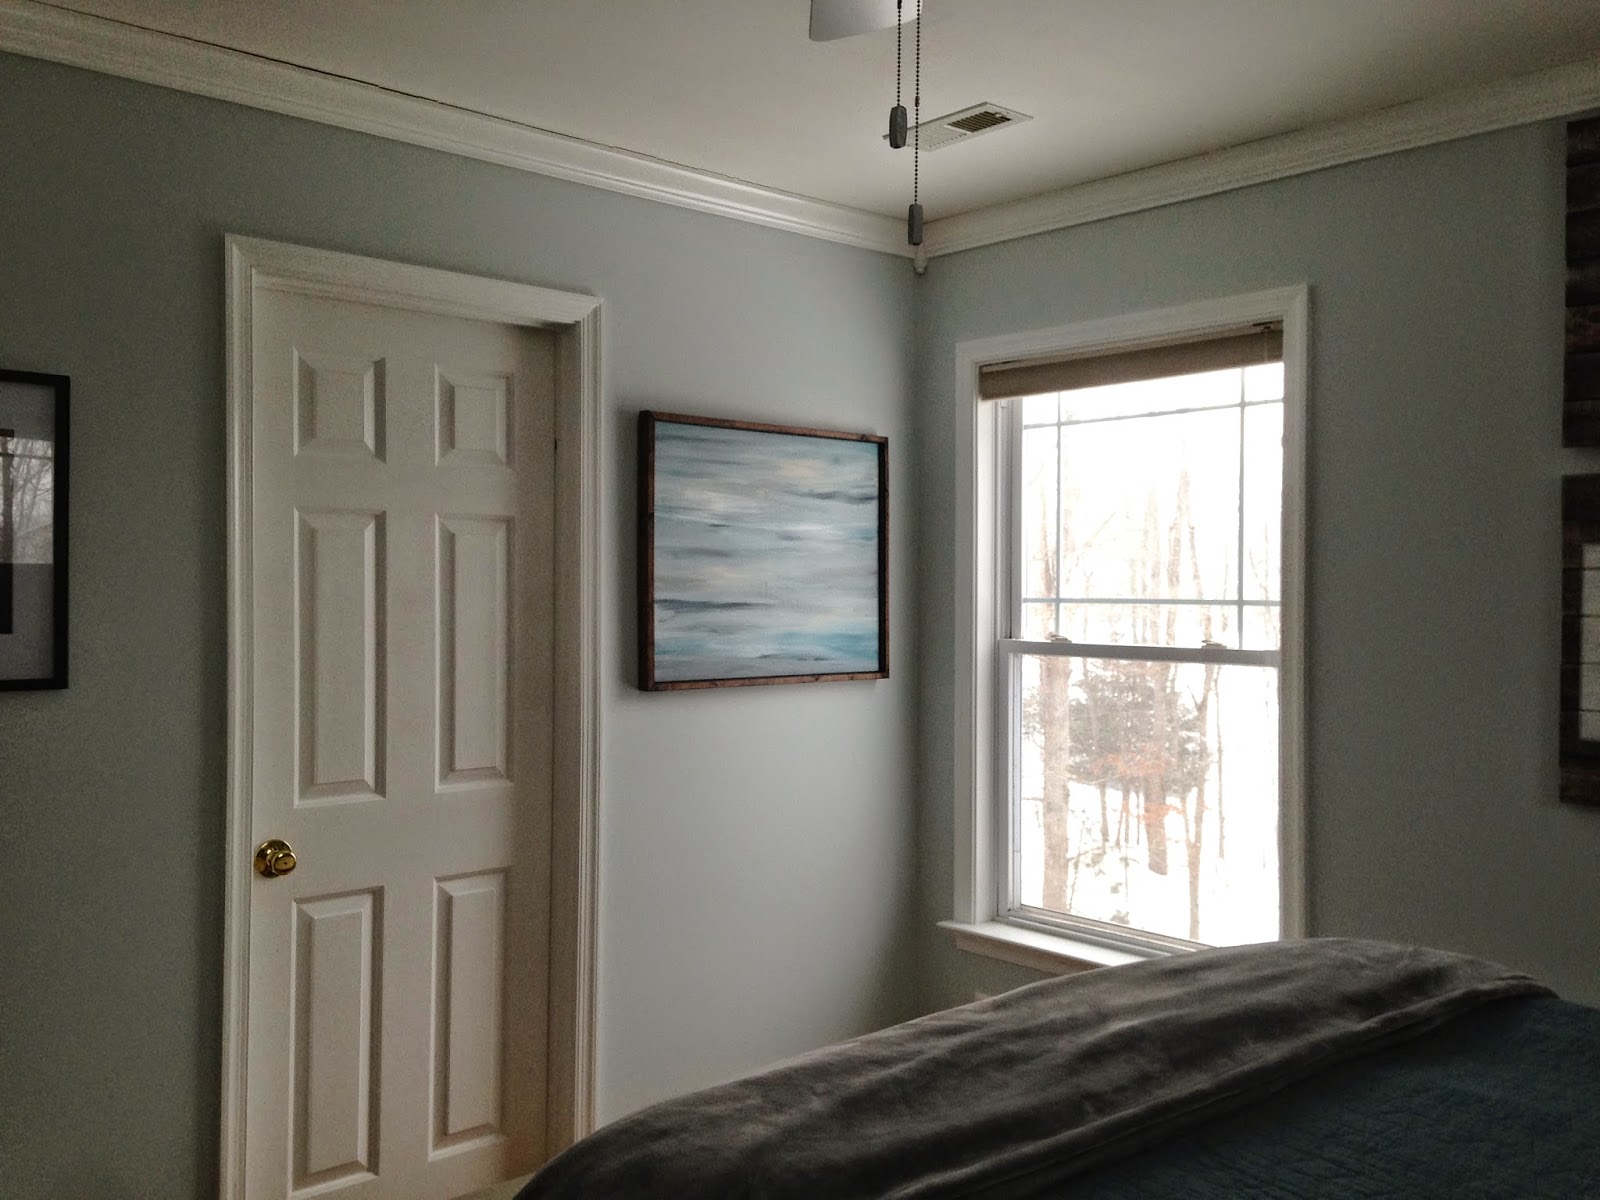
After living with my DIY painted canvas on the wall of our bedroom for the last week or so, I decided it just couldn't stay there. I had worried about it being too large for the space, and it was continuing to bother me, so I took it down and hung it in River's room, where it looks a lot better.

fuzzy nap time picture of the painting in River's room

I thought about buying a smaller canvas and painting it, but then decided to see what I already had that might work. Well, to be more accurate, I was reorganizing the basement bedroom closet and found some ironwork pieces that I've bought at various times over the last few years from Hobby Lobby. I'd forgotten I had them, so it's nice to be able to put one of them to use finally.

I hung one scrolly one that I liked on the wall, but it looked a little plain all by itself. I forgot to take a picture of it on the wall, but here it is on the dining table.


I went to the shed and dug through my piles of wood and scraps and found just what I needed. I found a panel that used to be part of a filing cabinet or printer table years and years ago. They didn't survive one of our moves, but I was able to salvage some of the solid panels and have saved them for various projects (I used another for our Christmas tree crate).

I also found enough trim of some sort to frame the panel.

I forgot to take a picture of the front of the panel, but here's a picture of the rougher backside- 
you can see the blah and uninspiring blond wood

I lightly sanded the top of the panel so the wood would take some stain and paint and then cut the trim pieces to size. I managed to do both of these outside on a day when the temps were above freezing (barely), so I counted it as a win since it wasn't below freezing with a below-zero wind chill. A garage sure would be nice....

Anyway, the first thing I did was stain the trim and panel with Kona stain. I wasn't exactly sure where I was going with the panel, so I just decided to layer things on and see how it turned out. After the stain dried, I did two coats of chalk paint in Aubusson. I think that's the color- it was actually what was leftover from another project and was in an unmarked jar (oops!). I may have mixed another color in when I used it the first time. In any case, it's a nice dark blue.


After the paint dried I sanded it a bit, and then rubbed on a little more Kona stain, keeping to the edges for the most part. I thought the stain was a bit heavy, so I did a little more sanding till I liked how it looked. I wiped it down and gave it a coat of dark furniture wax, which gave the panel a nice smooth finish and darkened the paint a smidge.


I glued and nailed the frame pieces to the panel and each other. The last step was to use some small nails to hold the scrolly piece in place. And I was finished!


Well, almost. I put some screws in the back and attached some wire so I could hang the piece from the screws in the wall in our bedroom. I hung it on the wall and I then I was really done. Though I may need to lower it a little on the wall.


I'm really happy with how this turned out. What makes it even better is that we had everything sitting around already, so it didn't cost me anything.

Thursday, February 26, 2015

Irish Music Session

crappy phone pic in low light
notice how Sunshine has turned herself so she's not facing the patrons


When Irish musicians get together to play, it's called a session. I have no idea why, but it is.

Sunshine's fiddle teacher organized a session for the kids last spring as an alternative to the traditional recital, and she'll be doing the same thing this spring.

The Irish music school we're involved with holds weekly adult sessions (Mr M has attended once or twice, but his skills aren't quite up to speed, literally), but there hasn't been anything for the kiddos.

One of the teachers (my whistle teacher, among other things) decided that needed to change, and has organized a monthly kids' session.

Last week was the first meeting, and despite the cold temps and piles of snow everywhere, we went (though I did contemplate staying home in our warm house). Others were more easily swayed by the bad weather, and only one other girl and the teacher showed up. Despite the small group, they were able to play several songs together and have a good time.

I could tell Sunshine was nervous (she hasn't had a lot of experience playing in front of others), but she did a good job and soldiered on. The advantage of these sessions is that they're held at an Irish pub, so everyone's busy eating and the music is just in the background. Some patrons pay attention, but it's not like the performers are being stared at on a stage.

One elderly couple who knew the other family that participated were kind enough to give the girls a tip, which they thought was so cool. Their first paying gig! Ok, barely paying, but still :) It left them with an upbeat memory of the experience. Sunshine can be a bit negative about experiences that she's not completely comfortable with, and those few dollars pushed her to the positive side of things. We're looking forward to next month to see who shows up and who knows which songs.

Wednesday, February 25, 2015

Snow Days!

after Monday's storm

We had a snow storm last Monday and instead of melting that day or the next (like it usually does), the temperatures dropped and stayed cold (frigid) all week. We got another snow storm Saturday, and while the temperatures rose a little Sunday, it wasn't enough to melt the foot or so of snow we'd received. It did leave a nice crust on top that Sunshine has had fun with. Temperatures are still lower than normal here and we're supposed to get more snow tonight or tomorrow morning.

Sunshine couldn't resist playing outside during Saturday's storm and came in looking like a frosted cupcake

Everyone who's from around here is bemoaning the snow and cold, but we're loving it! Well, maybe not the below-zero wind chills, but having snow that actually hangs around is great.
cold weather + actual snow = real winter!

Monday's snow was dry, but Saturday's snow ended with some sleet and a little melting on Sunday, which made for much better sledding conditions.


Sunshine loves the snow and will play in it for hours. River is not nearly as enthralled at this point.


We bundled River up, and he was very much underwhelmed. He's worn leather soft shoes his whole life and can't stand the heavy, non-flexible snow boots we forced onto his feet. He was afraid to move and acted like he was going to fall over at any second. We took him outside, and he just stood there. We tried to get him to sled with Sunshine, and he cried the whole time. Not a successful venture, but hilarious to watch his over-reactions.


Tuesday, February 24, 2015

Printer's Tray into Souvenir Pin Display

oops, just noticed the dirty vent- guess I need to clean that off!
and that ugly chair will not be staying ugly for too much longer

We tend to buy pins when we go places- they're small, inexpensive, and have the name of the place we visited, so we can remember where we visited. Much better than t-shirts or mugs or something :)

My sister put some felt in a large picture frame to display pins from her travels. I thought about doing the same, but decided to use a printer tray I found at a yard sale years ago.

I thought I took a picture of the tray on the wall before I got started, but I can't find it, and this is the best I could find

The tray has a wood bottom with wood dividers. I didn't want to stick pins into the wood, so I came up with a process that works well for holding the pins and looks nice.

I started by cutting rectangles of thick (6mm) craft foam for each little opening. I made sure that each piece of foam was cut just a little larger than the space so that the foam would stay in place because of the snug fit.

I then cut matching pieces of thin, sticky-back foam, and laid those pieces out on sheets of gray craft felt. I found it was easiest to cut the felt around the foam, rather than cut them separately and try to match them up.
the space with the two pins already in it was my test space where I made sure this would work before I cut all those pieces of foam

The last steps were to put double-stick tape on the front of the sticky-back foam and then fit the foam/felt piece into the space, pressing firmly so the tape would stick to the foam already in the space.
foam + felt; felt on the foam; tape on one side of the foam with felt on the other


Below I've added pins from our various trips. Some would fit better if the tray was oriented horizontally instead of vertically, but then some of the challenge coins wouldn't fit. I'll leave it alone for now.


I then added Mr M's challenge coins to the lower section. I need to figure out how to make them stay in place. Right now they're just setting on the dividers and the slightest bump will send them flying to the floor.


I'm missing some of the pins and coins we've collected, but I'm sure I'll find them as I sort through our bins of stuff to be scrapbooked. I'm super behind on our scrapbooks (I haven't done anything since Sunshine was tiny), but I'm determined to get caught up.

I'm happy with how this project turned out. It was a bit repetitious and tedious, but the end results look nice and we now have a way to display our souvenirs. And I'm finally using that printer's tray...

Monday, February 23, 2015

The 11 Mile Long Run That Wasn't

yay for lots of snow! 
Sunshine was very disappointed that it was too dry for good sledding and snowmen

I spoke too soon last Monday about feeling better. I felt crummy all week, and Friday I felt worse than I had the rest of the week. I had thought I could at least walk a few miles Friday, but even that wasn't happening. In fact, I stayed in my pj's all day and took it easy in the hope that all the rest would help me heal faster. I'm not sure if it was enough. I still have the sore throat I've had for the last week and a half, and I'm feeling bad enough that if I don't feel better tomorrow I'll be going to the doctor to make sure it's not strep or something.

Monday- still dealing with my cold, so decided to rest
Tuesday- feeling better (though not 100%), treadmill walk
Wednesday- treadmill walk
Thursday- treadmill walk
Friday- rest
Saturday- rest

When I went to bed Friday night, I still wasn't feeling great, but I figured I could manage to walk 7 or 8 miles the next day. While I did feel a little better, and I did think about hitting the treadmill, I ultimately decided another rest day was in order. I could have pushed through my sore throat and cold, but being perpetually tired because of my training and pregnancy is not conducive to healing. So as much as I wanted to increase my mileage, I didn't want to do it at the expense of my health.

Total mileage for the week: a paltry 5.19 miles.  Way lower than last week, but given how I feel, I'm ok with that.

--------------

My race calendar had me scheduled for an 8 mile race this Saturday, but about two weeks ago I had some serious concerns about the scheduling. Mr M can't watch the kiddos that day and the race is far enough away that I'd have to leave at 6:30 am. Finding childcare at that hour of the morning was not going to be easy.

Coincidentally, I was looking through the local race calendars for a race to run in May when I noticed that a local 5k had been added for the same day I was supposed to run my 8 mile race. When I had looked originally, the only races I could find in February were the mud run I've done in the past (the first time I ran it I was about 10 weeks pregnant with River and it's not something I want to do while 20 weeks pregnant) and the 8 mile race an hour and a half away. I had intended the 8 mile race as a tune-up for the half marathon, but in the interest of scheduling I decided a 5k speed workout would be just as beneficial.

And then last week we had about a foot of snow and temps in the teens and twenties with wind chills in the negatives. This week is supposed to be a smidge warmer, but I'm not holding my breath on that. I've been training exclusively inside, so I'm not acclimated to the colder temps, and I'm still sick. So this race may end up being a 5k I do just to keep my body moving so I can try to keep up my training.

Sunday, February 22, 2015

Sunday Funny

having fun with the couch cushions

River randomly bit Mr M's big toe awhile ago. We're not sure why his face was down by Mr M's feet or why he thought it would be a good idea, and it definitely caught Mr M unawares.

The other day I was sitting cross-legged on the bed with River, and he moved his face slow-motion (with his mouth wide open) down towards my toes. I had socks on, but he knew my toes were in there and he thought it would be funny to bite them. The mischievous look on his face said he knew exactly what he was doing, and was waiting to see how I'd react. He's definitely testing us :)

Thursday, February 19, 2015

DIY String Art


I've been busy making things to hang on the walls of our bedroom (States Art, DIY Painted Canvas), and I needed just one more to hang on the wall above my nightstand. I've been seeing a lot of string art lately, and decided to give it a try. Since it's in our bedroom, I thought a heart theme would be appropriate. When I was googling around for ideas, I came across this one:
 
I really like how "Love" is on top of the heart itself, and I like the two-tone look.
I also found this string art:
I like the monochromatic look of this one, and the hollow letters are a nice contrast to the string heart.

I also found some "love" string art where the word love was written in a cursive font and the string filled in the letters. I liked the idea of "love" written in cursive, and decided to put that in a heart.

This was a fairly inexpensive project since I had some of the materials already.

Materials:
Wood panel (painted)
3/4" wire nails
string
1x2 (stained)

The wood panel is leftover from the desktop of the desk I built in our rental. I cut it up for another project awhile ago, and this was the only piece left. It was about 22"x24", and the only thing I did to it was to give it a couple coats of white paint, which I had sitting around from painting trim in the house. I used just over two boxes of 3/4" wire nails that I purchased from Lowes. I used almost three rolls of string that I purchased from wallyworld (see picture below for the brand). The 1x2 pieces were scraps from our scrap pile and the stain was leftover from when I stained the dining table, sofa table, and shredder cover.

I first did some searching for a nice cursive font that would work well with what I intended to do. I ended up downloading the Marcelle Script, which is a free font, but I don't remember the exact site- shouldn't be too hard to find though.


I had to pull the letters closer together because they were too far apart for the look I wanted. Even then, the letters didn't actually connect to each other, so I drew in the connecting parts, as you can see above. You can also see where I shaded in the weird distressing in the letters. This font has a great shape in general, but the distressing was a bit distracting and unnecessary for this project, so I just colored over them.

After I liked how the letters looked, I cut a large heart around them. Once I was happy with the shape, I started marking off where I wanted the nails to go. I spaced them 1/2" apart, though in a couple areas in the word the markings were a little closer to preserve the proper curvature of the letters.


Then I started hammering 3/4" nails into the wood. This project has a lot of repetition, but that's what Netflix is for, right?
 I ran out of nails and had to get more


Once all the nails were in, I removed the paper. Pulling the paper off the letters was a pain since the nails went through the paper. The edges of the heart were super easy to take care of.
bad night time photo

all nails weren't completely straight, but I tried

I used almost three full spools of this thread that I found at wallyworld. It's a nice gray color that has some shine to it.

I ran out of string (I only bought two spools originally) at 10 pm during a big snowstorm. Needless to say, it took me another couple days to finish this project. While I was waiting for the weather to clear up, I attached the frame that I had cut and stained at the beginning of the project, back when I cut and stained the wood for the frame for the canvas I painted.

Once I made it back to the store, I finished filling in the string, then outlined the letters and the heart.


I had originally planned on filling in the letters in red, rather like the top inspiration photo I included above, but I decided I liked it better this way, so I left it alone.


This was an oddly soothing project. Between the repetition and finding ways to fill in all the spaces, I quite enjoyed the process. I might have to do another string art project just to have some more zen time :)

Once I was finished with the front, I screwed some screws into the back and wound some wire around them, then hung the whole thing in our room. I really like how it turned out and now I'm thinking of doing the kids' names in string art for their rooms. I've got most of the materials already....

Wednesday, February 18, 2015

DIY Canvas Art


I've seen similar projects on several blogs and decided to give it a try so I'd have something to put on the wall in our bedroom between the bathroom and the window.

I found a 2-pack of 24"x30" stretched canvases at wallyworld for $15. I was going to look for an old painting to paint over at Goodwill, but I haven't had good luck finding useable pictures or frames there, so I jumped on the 2-pack.

I started by painting a coat of gesso to prime the canvas.

Then I dripped, well glopped, paint leftover from various projects on the canvas. If I do this again, I would definitely use less paint. Once the paint was on the canvas, I brushed back and forth until I was happy with how it looked.


I think that brushing on one color at a time would probably work the best. I glopped all my colors on at once, then started brushing back and forth. Because of the delay in getting to some of the paint, I have dried drops and splotches that show under the paint. It's just the texture showing through, but they're there. I haven't decided yet if that adds character, or just shows how clueless I am when it comes to painting. Probably the latter. Good thing I'm not doing this for money :)

It's rather abstract, but I like the colors, and it will bring some color to our bedroom wall. The more I look at it, the more I think it looks like a stormy sky above the ocean.


While the painting dried, I cut a 1x2, then stained it and nailed it to make a frame for the painting. I also screwed two screws into the back of the canvas frame and ran wire between the screws. The last step was to hang my masterpiece on the wall.


Like a lot of my projects, it's not perfect, but I do think it turned out well. Though as I'm looking at these pictures, I think it may be a bit too large for that particular space, so I may move it to another wall in our room. Decisions, decisions.