Tuesday, October 23, 2012

Ruffled Candy Corn Skirt

While browsing blog posts in Google Reader, I came across the cutest ruffled candy corn skirt here.

She upcycled old t-shirts, but I didn't have any old t-shirts to use. I checked the dollar store, hoping to find some cheap shirts there, but they only had black t-shirts. So I went to JoAnns, where I bought 3 adult size L shirts for $9. Not as good as free or $3, but $9 isn't terrible, and I have some scraps leftover for other projects.

Because I used adult L shirts I had to cut down the white shirt to use for the skirt base, but from there I followed her directions except I made the ruffles 5" instead of 4", which resulted in a longer skirt.

Getting the ruffles evenly spaced is always the part that takes the longest, but other than that, it was a quick and easy project. And it turned out large enough that she can wear it next year, too :) She got lots of compliments when she wore it the other day. I think we got the t-shirt at Target on clearance after Halloween last year.


Have you sewn any cute Halloween outfits?

Monday, October 22, 2012

48 Hour Trip Across the Country and Back


Last weekend we had a 48 hour whirlwind trip to California and back for the funeral of one of my uncles. In hindsight, we should have spread out the trip a bit longer (all that travel time was very intense), but I’m glad we were able to go.

We were up super early to drive to the big airport two hours away (we prefer the small airport 10 minutes away, but because of the short notice had to go with the big airport). Two flights later, my brother picked us up from the airport and we drove to Monterey. We had a few minutes to spare, so we drove past the houses we used to live in then went to the church for the funeral. It was a very nice service, and we were able to see most of my aunts and uncles on my mom’s side, as well as a good number of my cousins. It’s been quite a few years since we had a family reunion, and it’s sad that it took a funeral to bring us together.

We conked out pretty early (local time, but late our time) but got to sleep in a little before heading back to the airport. Our layover on this leg happened to be 3 ½ hours long in the airport closest to Mr M’s and my parents. So his parents, my parents, my youngest brother (who’s still in high school) and Mr M’s sister and her kids all drove out and spent a couple hours visiting with us. Since out of that group we’ve only seen my dad in the last 15 months, it was a really good visit. So good that we were almost late for our plane.
The Little Miss with Mr M's parents

The Little Miss with my parents

Technically we got to the gate after the time they should have started boarding, but for whatever reason they hadn’t started yet. Which was nice, since we really needed to visit the restroom before getting on the plane.  On the trip out we were stuck in our seats for the first 2 ½ hours because of turbulence and the Little Miss was NOT happy. Luckily I was able to distract her and she made it till they let us out of our seats. Several adults didn’t and got lectured by the flight attendants on the dangers of being out of their seats in turbulence. But when you gotta go, you gotta go. We didn't want a repeat of that, so we hit the bathrooms one last time before boarding.

We landed after an uneventful flight and drove home on nearly deserted freeways- 2 am is about the only time that happens. Which was nice till the car in the left lane a ways ahead of us suddenly flipped two complete donuts before swerving across the remaining lanes of the five lane freeway and pulling off to the right shoulder and turning the headlights off. 30 seconds later, the headlights were back on and they pulled back onto the freeway.

?????????????

Despite the donuts, the driver seemed to be in control- no blown tire, no wild veering off into the concrete median thingy. It was really bizarre. I’m just glad we weren’t closer when it happened, though we did have to brake a little to make sure we didn’t get too close to the craziness.

We drove the rest of the way home and crashed in our beds- 48 hours after we left.

What’s the craziest thing you’ve seen on a freeway?

Sunday, October 14, 2012

Sunday Funny

What happens when I leave my camera laying around? 

Little Miss Sunshine takes pictures of her Nannie.


She did several versions, and while the exposure is off and they're not in focus, I think it's hilarious.
Obviously she's watched me taking multiple pictures of the same thing, trying to get it right.

Friday, October 12, 2012

Fun with Fireplaces

This week was a vacation week for us, and I spent my time diligently working on projects around the house instead of going on fun road trips with my sister. 

** I painted the vanity in the upstairs hall bathroom. The paint is still curing, so I haven't reinstalled the hardware yet, so no picture.

** I FINALLY finished painting the shelves for the bookshelves in the library. They're now curing also, so again, no pictures. While I was at it, I finished painting some other wood projects also.

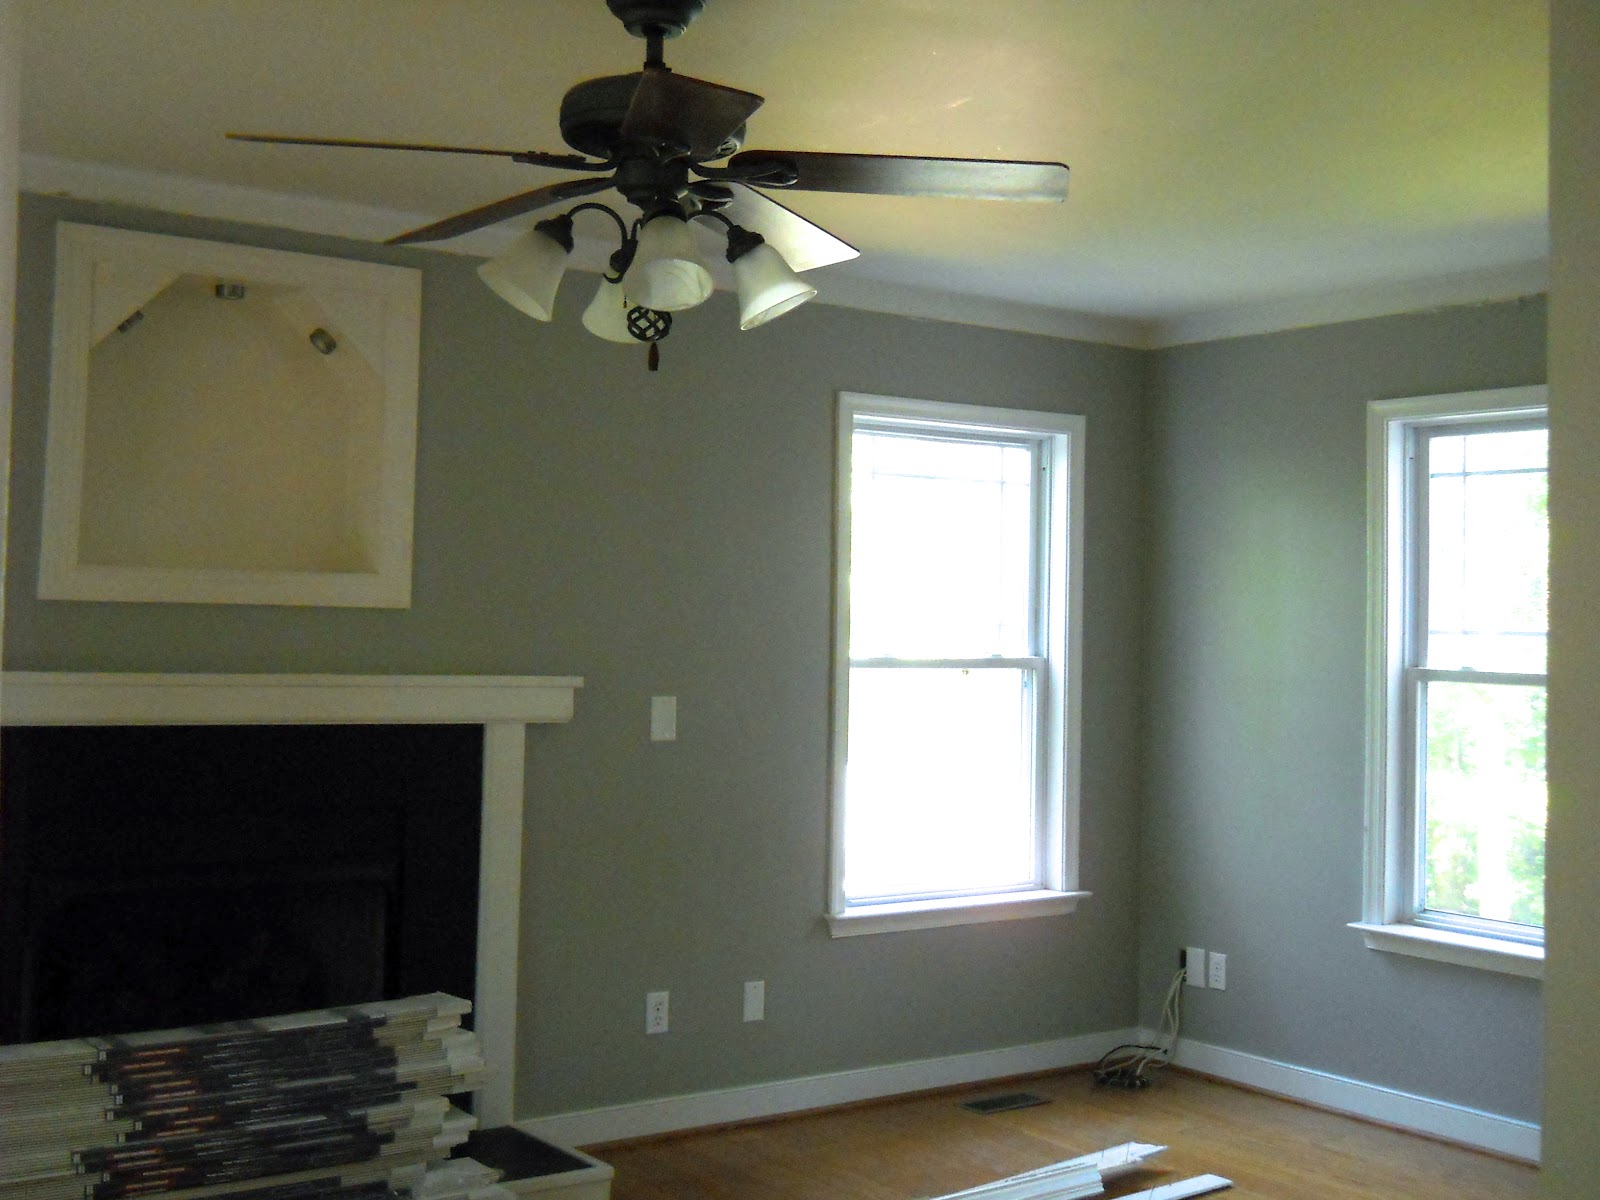
** I worked on our living room. This included spackling and sanding the tongue and groove paneling, then priming it and painting it.  I then spackled the walls where the crown moulding used to be- I used an exacto knife to cut the caulk, but still managed to peel the paint when I took down the crown moulding. Then I sanded and primed in preparation for new paint. I also ripped out the fireplace surround and spackled and primed there as well. After that I taped off all the woodwork, and am now ready to paint the walls- no more dull gray!

I don't have pictures yet of the fireplace in it's spackled and primed glory, but here's a before picture. The black slate is ugly and I detest the 1 inch wide mantle- it's completely useless.

And here's a picture with everything ripped out, and the mess not yet cleaned up. I had to take a hammer to the slab in front of the fireplace and break it into 4 or 5 pieces to remove it- it was firmly glued to the plywood that was screwed to the 2x4 frame. Way more work than I anticipated, but at least it's done.

If you look closely, the hole above the fireplace looks a lot different. Turns out that the previous owners built a box that was smaller and less deep than the original TV hole (which is two feet deep). Our neighbors had mentioned that there used to be a TV above the fireplace, but I could never figure out how- the space was too small and there were no plugs. It all made sense once I pulled the trim off. We're still deciding what we're going to do with the gaping hole: drywall over it or create some hidden storage. I'm leaning toward the latter, but haven't yet figured out how to make the hidden storage look good and not be obvious.

 I'll post more pictures next week as I get more done. The fireplace probably won't get finished right away, as we're still deciding what exactly we want to do with it. Anything should be better than that nasty black slate, but we don't want to just slap something up.

Friday, October 5, 2012

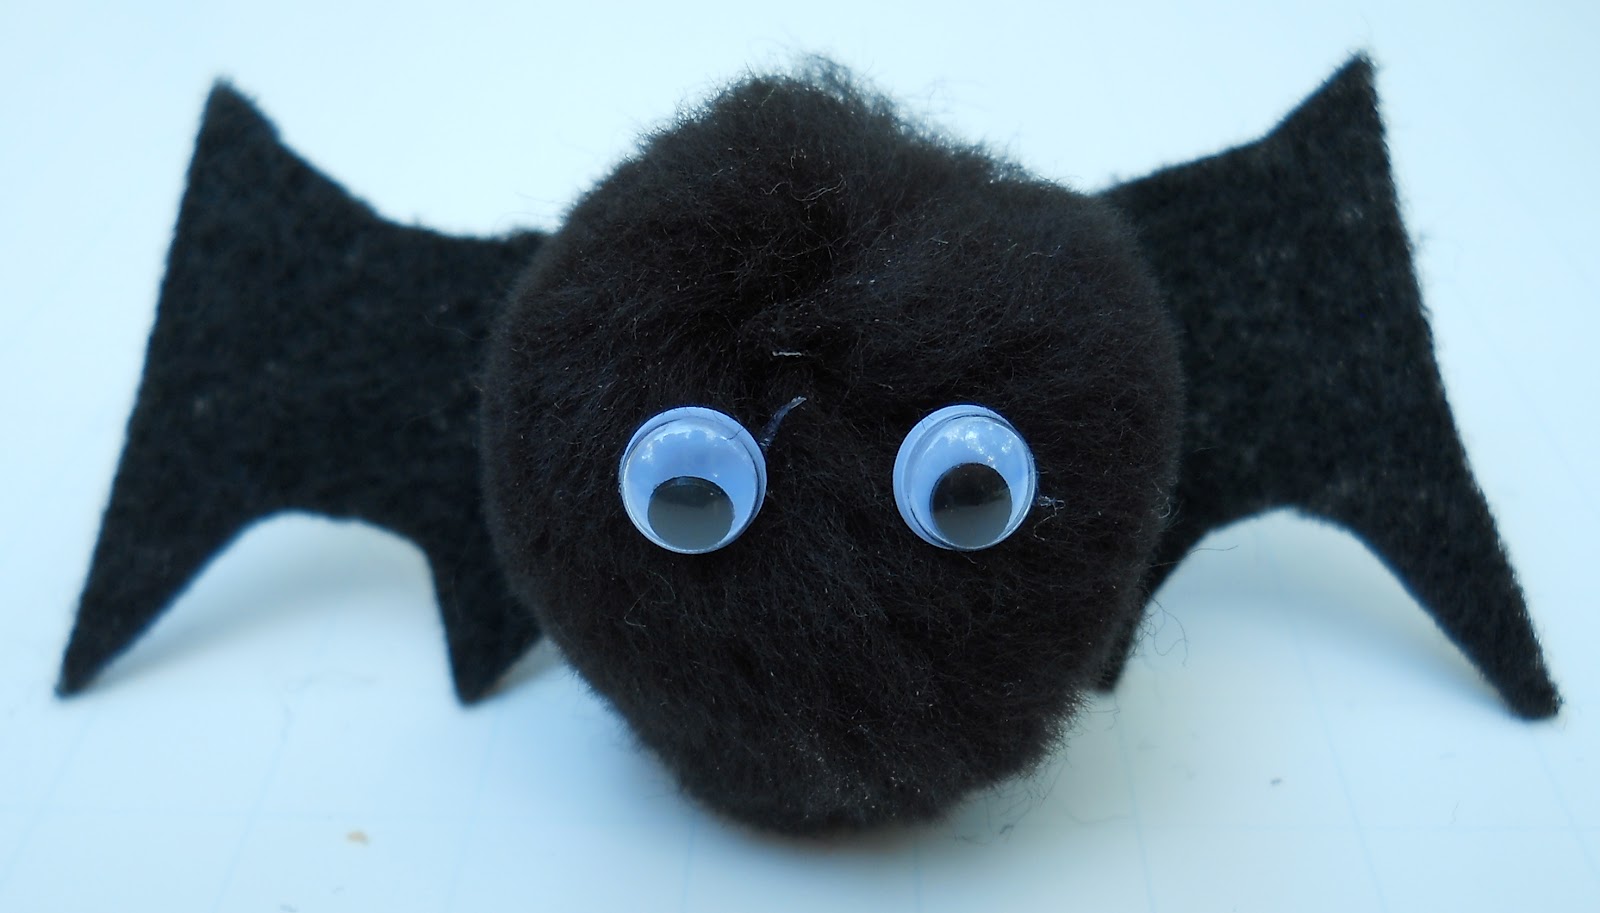
Cub Scout Bat Neckerchief Slide


Not too long ago I was released from my calling as Relief Society president and called as a Cub Scout den leader. I've never done Scouts before, but I'm looking forward to learning new things, which happens with all my callings. I remembered that my mom was a Scout leader for a number of years and that she had quite a collection of neckerchief slides that they had made, so I gave her a call and she sent me some pictures of the slides for visual inspiration.

We'll probably do a new slide each month, which will help the boys build a collection, which is one of their requirements (at least it is for the Wolf Scouts). For our first slide we did an easy bat, which I thought was a good choice for the month of October.

Materials:
Black felt
1.5" black pom poms
.5 or .7mm googly eyes
1/2" conduit, cut into 3/4"long pieces (I used electrical conduit because it was cheaper than pvc pipe, but either would work, and I used a pvc pipe cutter that we already had to cut the pipe. A hacksaw would work also.)
cardstock for wing pattern
low temp hot glue gun (so the boys don't burn themselves)


 Draw a bat wing shape and cut it out of the card stock.

 Using card stock pattern, cut bat wings out of felt. A white marker of some kind would be helpful here. I didn't have one, so I just carefully held the pattern on the felt and cut around it.

 Use the glue gun to glue two googly eyes to a pom pom. I put a tiny dab of glue on the back of the eye, then stuck it to the pom pom.

 Glue the pom pom to the wings.

Then glue the wings to the conduit piece. My conduit had black writing on one side so to hide it I glued the bat wings over it.


All done and ready to be worn!


Thursday, October 4, 2012

Living Room Paneled Ceiling Progress


The night we moved into our house, I took a nice long bath in our new soaking tub. While I was drying off, I heard water dripping downstairs. I rushed downstairs and found water dripping from the ceiling.  I grabbed some plastic bins for the water to drip into and some towels to clean up the mess. The next day was Sunday (of course), but on Monday I called a plumber who came out and found the source of our problem: the coupler between the drain and the drain pipe had crumbled. Unfortunately, he only found this out after cutting 3 holes in our ceiling. After replacing the coupler, he patched the holes, but left the mudding and sanding to us.

After very close inspection (once we knew what to look for), previous water damage to the ceiling could be seen. We figure the prior owners (who only lived here two years) used the tub once, it leaked, and they never used it again. And they didn't tell us. Not cool.

We discussed just breaking out the mud and finishing off the patch job. There was two problems with this: I was doubtful we could make the patch job really look good, and I'm really allergic to the dust that comes from sanding down drywall mud. I get sick even if I'm using my face mask. And the dust would spread throughout the house, continuing to cause problems.

After some thought, I decided I wanted to put tongue and groove paneling on the ceiling. Mr M didn't have a preference, especially since he knew he wouldn't be doing the work because of his crazy work schedule :) Once we decided what we wanted to do, we still had to wait till some in-progress projects were finished. Which, of course, took a while.

So for the last year and a half, the ceiling in our living room has looked like this:

We bought the boards back in July because I thought we'd be able to finally get started. Of course, it didn't work out that way, so they've been sitting in a pile on the floor of the living room.

Until Friday night.

Friday my dad came for one of his short visits. Since we still hadn't gotten the paneling up, I asked my dad to help me finally get it done. He was kind enough to agree and to stay up till 1:30 am with me as we powered through the project. It's a good size room, but it only took 5 1/2 hours to cut and fit and nail all the boards.

I love how it looks! It totally changes the look of the room- my dad got a farmhouse vibe off it, and I'm hoping once we're done with everything it will have a beach cottagey feel. I have to spackle and sand all the nail holes, but then I can paint it and put the crown moulding back up.

I had originally thought I could do this project myself, with the help of a tall tripod that would hold up one end of the board while I worked on the other end. After installing the boards with help I have to say there is no way I could have done this on my own- not with the 8' tongue and groove boards. I'm so glad my dad was able to help me with this!


Materials:
21 pkgs of 5 1/4"x 8' primed composite tongue and groove boards (4 boards to a package)
Lots of 2" brads (already had)
brad gun
radial saw (for cutting boards to length)
table saw (for ripping the boards that were put in last and needed to be narrower)
jig saw (for cut outs around the electrical boxes for lights)

Method:
These boards are actually quite lightweight and only 1/4" thick, so we didn't bother with adhesive or even finding studs- just used lots of brads, especially on the corners of boards that butted up to each other. We started in one corner and worked our way across the room. We also moved up and down the room, turning when we came to the wall and working our way to the other wall, where we turned again. We tried to stagger where the seams were by using boards of varying lengths, which sometimes meant chopping a board shorter before nailing it up so that the seams weren't too close to each other. Because I'll put the crown moulding back up we didn't worry about butting the edges right up to the walls. Since the boards are tongue and groove, each one has to be fitted into the one next to it. Most of the time this went pretty well, but on occasion we used a section of a 1"x12" board that I pulled out the scrap bin to help push the boards together. We had to be careful not to ruin the tongue of each board, and the 1"x12" did a good job.


Why did we decide on the composite boards rather than solid wood boards? I had read some reviews that cited many problems with the tongues and grooves of the solid wood boards (they were in a package and couldn't be inspected before purchase). There were no such problems cited for the composite boards. Of the 21 packages we went through, we only had one board that truly could not be used- the groove ended up on the bottom of the board rather then down the middle of the board.  We set it aside, but we ended up ripping it down and using it to fill in the narrow space between the last full width boards and the wall, so we were still able to use it. The composite boards are also lighter and thinner than the solid wood boards, which is good, since we installed them on the ceiling. We could have used adhesive, but I didn't want to do something quite so permanent. I was a little concerned that it would be obvious that they're composite, but I don't think that will be a problem, especially once I've painted them.


Now I'm trying to decide if we should put white fan blades on the ceiling fan. I like the gray metal and it's a decent style as far as fans go, but I don't think the cherry wood fits with the beachy feel I'm aiming for. Thoughts?

Monday, October 1, 2012

September Goals Re-cap

LMS has started her fall soccer season- and I'm not coaching this time (yay!)

Since I wrote down some new goals, I thought I should track my progress at the end of each month. So here's how I did in the month of July:
(August's progress report can be found here)
(July's progress report can be found here)
(June's progress report can be found here)

A few goals under Health:
1. keep strengthening my knee and start running for longer periods of time/distance
I'm still struggling to exercise on a regular basis. My sleep schedule has been off since I got sick, which has made it harder to get early am workouts in. Still working on this.
2. train for and run at least 4 races by the end of 2012 (at least one half marathon)
I ran the 4 mile race Labor Day weekend, which brings my total to three races this year, the first of which was a half. Now I'm working toward a 5k I'm doing with LMS in October.
3. be more careful with my eating and lose some weight
I lost 4 more pounds, for a total of 15 pounds lost so far (yay!). I'm still watching my portions and we've started eating our larger meal at lunchtime rather than at dinner time. This started because I was having problems with nausea and lack of appetite in the evenings after being sick in August. The stomach problems have mostly cleared up, but I like how I feel when I eat less in the evening. Now I just have to be more on the ball with meal prep in the am.

A few goals under House:
1. finish painting all the rooms
I finished the trim work in the upstairs hall, bath and master bedroom, and painted the stairway. More rooms to go still...
2. do the family room ceiling
Finally got the paneling up! post to come... I need to spackle and paint, but the hardest part is done.
3. finish building built-in shelves in the library
Still painting the shelves- I swear this is a never-ending project.

A few goals under Homeschool:
1. stick to the schedule I've worked out, as much as possible
We're still doing pretty good.
2. be more consistent with violin practicing
Since we started school we're doing better because it's in our school schedule.

A few goals under Habits:
1. practice the piano more frequently
No time yet, maybe in October...
2. index several batches every week for FamilySearch
Tried to do some, but I'm having problems downloading the program to my new computer. I've tried a couple times and it hasn't worked. I need to figure out why.
3. have more meaningful daily scripture study (start journaling as I read)
I found some great ideas here and have started a topic journal, focusing on people in the Book of Mormon. 
How did you do with your goals this month?

Sunday, September 30, 2012

Conversations with LMS

My dad came for a quick visit this weekend, and Friday afternoon before he got here, we had the following conversation.

LMS: Why does Opa call me squirrel?
Me: Why do you think?
LMS: I don't know. I'm not a squirrel, I'm a human!

I don't know, she looks kind of like a squirrel to me!

Saturday, September 29, 2012

Master Bedroom Progress

I've been busy working on various projects around the house, but the problem with that is that none of them are quite done yet, so it's hard to show the progress I've made. I've finally done enough work on our bedroom that I can post some photos, even though the room isn't finished yet.

Apparently I'm really bad at taking before pictures, since I just searched through all my old photos and can't find any since we moved in. Here's a photo from when we looked at the house. The color in the photo looks kind of yellowish, but in person it was more apple or lime green with a cream sponge job to tone it down a little. Not terrible, but not what I'd put in a bedroom.

This is the view from the hall door. The first thing I did was take down the hideous old fan (apparently no picture of that, either, but it was very large and ugly- wood fan blades, greenish metal faux finish on the rest, ugly glass lamp shades) and paint the ceiling flat white (my favorite color for ceilings)- it really lightens the room up after the drab beige that was there. I then installed a new white fan that is much less obtrusive. In general, I don't love the look of ceiling fans, but out here they're a necessity, so we looked for the least offensive style. I then painted the walls a light blue-gray that I mixed myself from paint we had. I was able to take in a sample and get it color-matched when I needed more. I installed crown moulding and painted it semi-gloss white and touched up the trim around the windows and doors and the baseboards. I also painted the doors- closet, bathroom, and hallway, because like everything else in the house they were builders beige. I love how crisp and clean and bright the white looks!

This view is from the bathroom door, on the same wall as the hall door. We used to have the bed on the wall on the left side of the room, but we're trying different arrangements, anticipating the day we'll need room for a bassinet (not that we know when that will happen, but you know me, just being ocd and planning ahead). I don't love the bed being in front of the window, but the room does feel more roomy.

Mr M and I designed and built this bed about 7 1/2 years ago, in the parking lot of the apartment building we lived in. We got a lot of comments from the other tenants- mostly amazed that we would even try such a thing. We love it, but we have had to tweak the original design a bit. We didn't want to use bolts to hold it all together (they look ugly), but quickly realized we had to do something to keep it all together. So we went with eye hooks and cables, which turned out uglier than bolts would have been, but you know what they say about hindsight. All these years I've been meaning to make some sort of cover for the cables, but never got around to it. That is on my list of things to do to finish off our room, as is a bedskirt and nightstands. 

I'm not convinced I like the dresser/hutch combo where it is. I might move it to the other side of the bed, or get rid of it entirely, replacing it with two nightstands rather than just one. If we keep it, I'll put different knobs on the drawers and get rid of the scalloped trim on top. I think the wood works well with the log bed, so I won't paint it. At least not right away :) The blue bench that you can only see a corner of in the lower right corner of the photo is a work in progress- it needs a cushion still, and I might end up repainting it now that the walls are done- I'm not sure I like the two blues together. I'd like a rug for the floor, but haven't yet decided on color, size, etc. The green bins on the shelf are pretty close to the former color of the room, and I'll paint them eventually. I'll also change out the lamp on the dresser- I like that it's a touch lamp, but I'm not fond of how it looks. But it was a wedding present and has been useful over the years.
The white fuzzies under the bed posts are pieces of carpet that we stuck to the bottoms years ago to protect the wood floors of the house we were living in.

I love how our room is much brighter and calmer. I actually want to spend time in here now :)

Wednesday, September 26, 2012

11th Anniversary


Not too long ago we celebrated our 11th anniversary, where we kept up our long-standing tradition of Mr M being out of town for our anniversary. Yep, it happened again :)

Good thing we don't get hung up on missing things like birthdays and anniversaries. Instead, we try to celebrate when we are all together, whether it's before or after the event. We just go with the flow and make the best of it.

Do you celebrate events when they happen, or when you get around to it?

Saturday, September 22, 2012

Super Yummy Nightshade Free BBQ Ribs

ok, so they don't look pretty, but they taste good! we served them with steamed broccoli and mashed roasted cauliflower. Yum!

Ribs are easy to prepare, but BBQ sauces have tomatoes and peppers in them, and rubs have paprika and cayenne (also peppers) in them. Since nightshades and I don't get along, that was a problem. We've been doing some research, and after some trial and error, we've come up with some ribs that are yummy and don't have the offending nightshades.

Super Yummy Nightshade Free BBQ Ribs (adapted from a recipe found here)

Baby back ribs
Fauxmato BBQ Sauce
Sweet Dry Rub

Remove membrane from back of ribs. Place ribs on a sheet of foil on a cookie sheet and sprinkle dry rub on one side, then rub it in. Turn over and do the same for the other side. Let sit for 15 or 20 minutes. Preheat oven to 350 degrees while ribs are resting. Spread bbq sauce on both sides of the ribs. Place a sheet of foil on top of ribs and fold over all sides, sealing the ribs into a packet. Bake ribs in oven for at least 2 hours. We've baked them for 2 1/2 hours and they've just fallen apart before we even got them on the grill. Experiment and see what works best with your oven. After removing from oven, carefully open foil and spread more bbq sauce on the ribs. Throw (or gently place) ribs on the grill for about 10 minutes each side. Be careful not to have the grill too hot or to leave them on too long as the sugars will burn instead of caramelizing. Remove from grill and enjoy!

This recipe is gluten free, dairy free, egg free, corn free, peanut free, nut free, coconut free, soy free, as well as free of tomatoes, potatoes, peppers, sorghum, tapioca, and shellfish. Always check labels before using to make sure the ingredients and/or manufacturing conditions haven't been changed.

Friday, September 21, 2012

Nightshade Free Sweet Dry Rub

When I made ribs this week, I first had to make the BBQ sauce and the dry rub.

BBQ rubs usually have paprika in them, but paprika is made from peppers and I can't eat it, even in small amounts. Because of the lack of paprika and the presence of black pepper, this rub is a bit peppery instead of spicy.

Sweet Dry Rub (adapted from a recipe found here, other ideas are there as well)
6 Tbl brown sugar
3 Tbl Sea salt or Kosher salt (you want a coarse salt that won't soak into the meat right away)
3 Tbl ground black pepper
2 tsp garlic powder
2 tsp mustard powder

Mix ingredients together and store in a cool, dry place.


This recipe is gluten free, dairy free, egg free, corn free, peanut free, nut free, coconut free, soy free, as well as free of tomatoes, potatoes, peppers, sorghum, tapioca, and shellfish. Always check labels before using to make sure the ingredients and/or manufacturing conditions haven't been changed.

Thursday, September 20, 2012

Fauxmato BBQ Sauce (Tomato Free)

I made ribs this week, which meant I finally sat down and tried to figure out our BBQ sauce recipe. This version tasted close to the one Mr M made awhile ago (but didn't document) that we've been trying to re-create since. This sauce gets a Korean BBQ sauce flavor from the sesame oil and ume plum vinegar, but it's not over-powering. In the past we've used a bottled Korean BBQ sauce that was really good that contained whole sesame seeds, so you could easily add a tablespoon or two of whole sesame seeds as well.

Fauxmato BBQ Sauce

4 c fauxmato sauce
2 tbl worcestershire sauce (recipe found here, mix together the ingredients below)
     1/2 c cider vinegar
     2 tbsp coconut aminos
     2 tsps water
     1/4 tsp mustard powder
     1/4 tsp onion powder
     1/4 tsp ground ginger
     1/4 tsp garlic powder
     1/8 tsp pepper
     1/8 tsp cinnamon
1 tbl sesame oil
1 tbl ume plum vinegar
1/3 c brown sugar
1 tbl coconut aminos (soy sauce substitute)
1 tsp fish sauce
1 tsp molasses
1/4 tsp tamarind paste
1/4 tsp ground cloves
1 bay leaf

Simmer for about half an hour. Remove bay leaf and use sauce. Freeze or refrigerate leftovers. Great on ribs and chicken.

This recipe is gluten free, dairy free, egg free, corn free, peanut free, nut free, coconut free, soy free, as well as free of tomatoes, potatoes, peppers, sorghum, tapioca, and shellfish. Always check labels before using to make sure the ingredients and/or manufacturing conditions haven't been changed.

Wednesday, September 19, 2012

Road trip with my sister

One of my sisters is in her 3rd year of residency and is trying to decide where she wants to target her job search. You can only learn so much online, so the best way is to visit potential places and see what they're like. She had some time off that coincided with our end of term break, so LMS and I got to go with her on her exploratory trip. Mr M had to work- we're saving his time off for a couple trips we have planned for next year, so it was a girls-only trip.

We did spend lots of time in the car, but we checked out some good potential neighborhoods and added to our respective light house lists.

Our first one was actually a pair of lighthouses on Fort Henry. The striped one is in use and you can't go up it, but you can climb the older brick one.


The view of both lighthouses from a pier not too far away.

We tried to see the Bodie Island lighthouse (we saw it last year), but this is what it looks like right now:

I thought perhaps it had been damaged by the hurricane last fall, but apparently it's several years into a reconstruction project, which should be finished by the end of this year.

We had much better luck at Cape Hatteras lighthouse, which we got to climb up. This is a cool lighthouse that was moved further from the waterline a few years ago. They moved it intact- jacked up and rolled about a quarter mile or so (over three weeks) to it's current location. Apparently it's the tallest brick building to be moved in the US. Very cool. Despite being still in use, they do allow people to climb to the top.


view of the original lighthouse site- the sand spot that's above and to the left of the parking lots- taken from the top of the lighthouse

We also saw the lighthouse on Ocracoke Island. It was quite short, especially compared to the Cape Hatteras lighthouse. It wasn't open to visitors either because it's still in use. We were less than impressed with the tiny parking lot in a residential neighborhood.

We got to ride a couple ferries during our trip, which was fun. I took the opportunity to take some photos of LMS.


One night we stayed very close to the beach, and while the water was too rough to go in, we did enjoy walking up and down the beach at sunset. We had a fun time!