Thursday, February 19, 2015

DIY String Art


I've been busy making things to hang on the walls of our bedroom (States Art, DIY Painted Canvas), and I needed just one more to hang on the wall above my nightstand. I've been seeing a lot of string art lately, and decided to give it a try. Since it's in our bedroom, I thought a heart theme would be appropriate. When I was googling around for ideas, I came across this one:
 
I really like how "Love" is on top of the heart itself, and I like the two-tone look.
I also found this string art:
I like the monochromatic look of this one, and the hollow letters are a nice contrast to the string heart.

I also found some "love" string art where the word love was written in a cursive font and the string filled in the letters. I liked the idea of "love" written in cursive, and decided to put that in a heart.

This was a fairly inexpensive project since I had some of the materials already.

Materials:
Wood panel (painted)
3/4" wire nails
string
1x2 (stained)

The wood panel is leftover from the desktop of the desk I built in our rental. I cut it up for another project awhile ago, and this was the only piece left. It was about 22"x24", and the only thing I did to it was to give it a couple coats of white paint, which I had sitting around from painting trim in the house. I used just over two boxes of 3/4" wire nails that I purchased from Lowes. I used almost three rolls of string that I purchased from wallyworld (see picture below for the brand). The 1x2 pieces were scraps from our scrap pile and the stain was leftover from when I stained the dining table, sofa table, and shredder cover.

I first did some searching for a nice cursive font that would work well with what I intended to do. I ended up downloading the Marcelle Script, which is a free font, but I don't remember the exact site- shouldn't be too hard to find though.


I had to pull the letters closer together because they were too far apart for the look I wanted. Even then, the letters didn't actually connect to each other, so I drew in the connecting parts, as you can see above. You can also see where I shaded in the weird distressing in the letters. This font has a great shape in general, but the distressing was a bit distracting and unnecessary for this project, so I just colored over them.

After I liked how the letters looked, I cut a large heart around them. Once I was happy with the shape, I started marking off where I wanted the nails to go. I spaced them 1/2" apart, though in a couple areas in the word the markings were a little closer to preserve the proper curvature of the letters.


Then I started hammering 3/4" nails into the wood. This project has a lot of repetition, but that's what Netflix is for, right?
 I ran out of nails and had to get more


Once all the nails were in, I removed the paper. Pulling the paper off the letters was a pain since the nails went through the paper. The edges of the heart were super easy to take care of.
bad night time photo

all nails weren't completely straight, but I tried

I used almost three full spools of this thread that I found at wallyworld. It's a nice gray color that has some shine to it.

I ran out of string (I only bought two spools originally) at 10 pm during a big snowstorm. Needless to say, it took me another couple days to finish this project. While I was waiting for the weather to clear up, I attached the frame that I had cut and stained at the beginning of the project, back when I cut and stained the wood for the frame for the canvas I painted.

Once I made it back to the store, I finished filling in the string, then outlined the letters and the heart.


I had originally planned on filling in the letters in red, rather like the top inspiration photo I included above, but I decided I liked it better this way, so I left it alone.


This was an oddly soothing project. Between the repetition and finding ways to fill in all the spaces, I quite enjoyed the process. I might have to do another string art project just to have some more zen time :)

Once I was finished with the front, I screwed some screws into the back and wound some wire around them, then hung the whole thing in our room. I really like how it turned out and now I'm thinking of doing the kids' names in string art for their rooms. I've got most of the materials already....

Wednesday, February 18, 2015

DIY Canvas Art


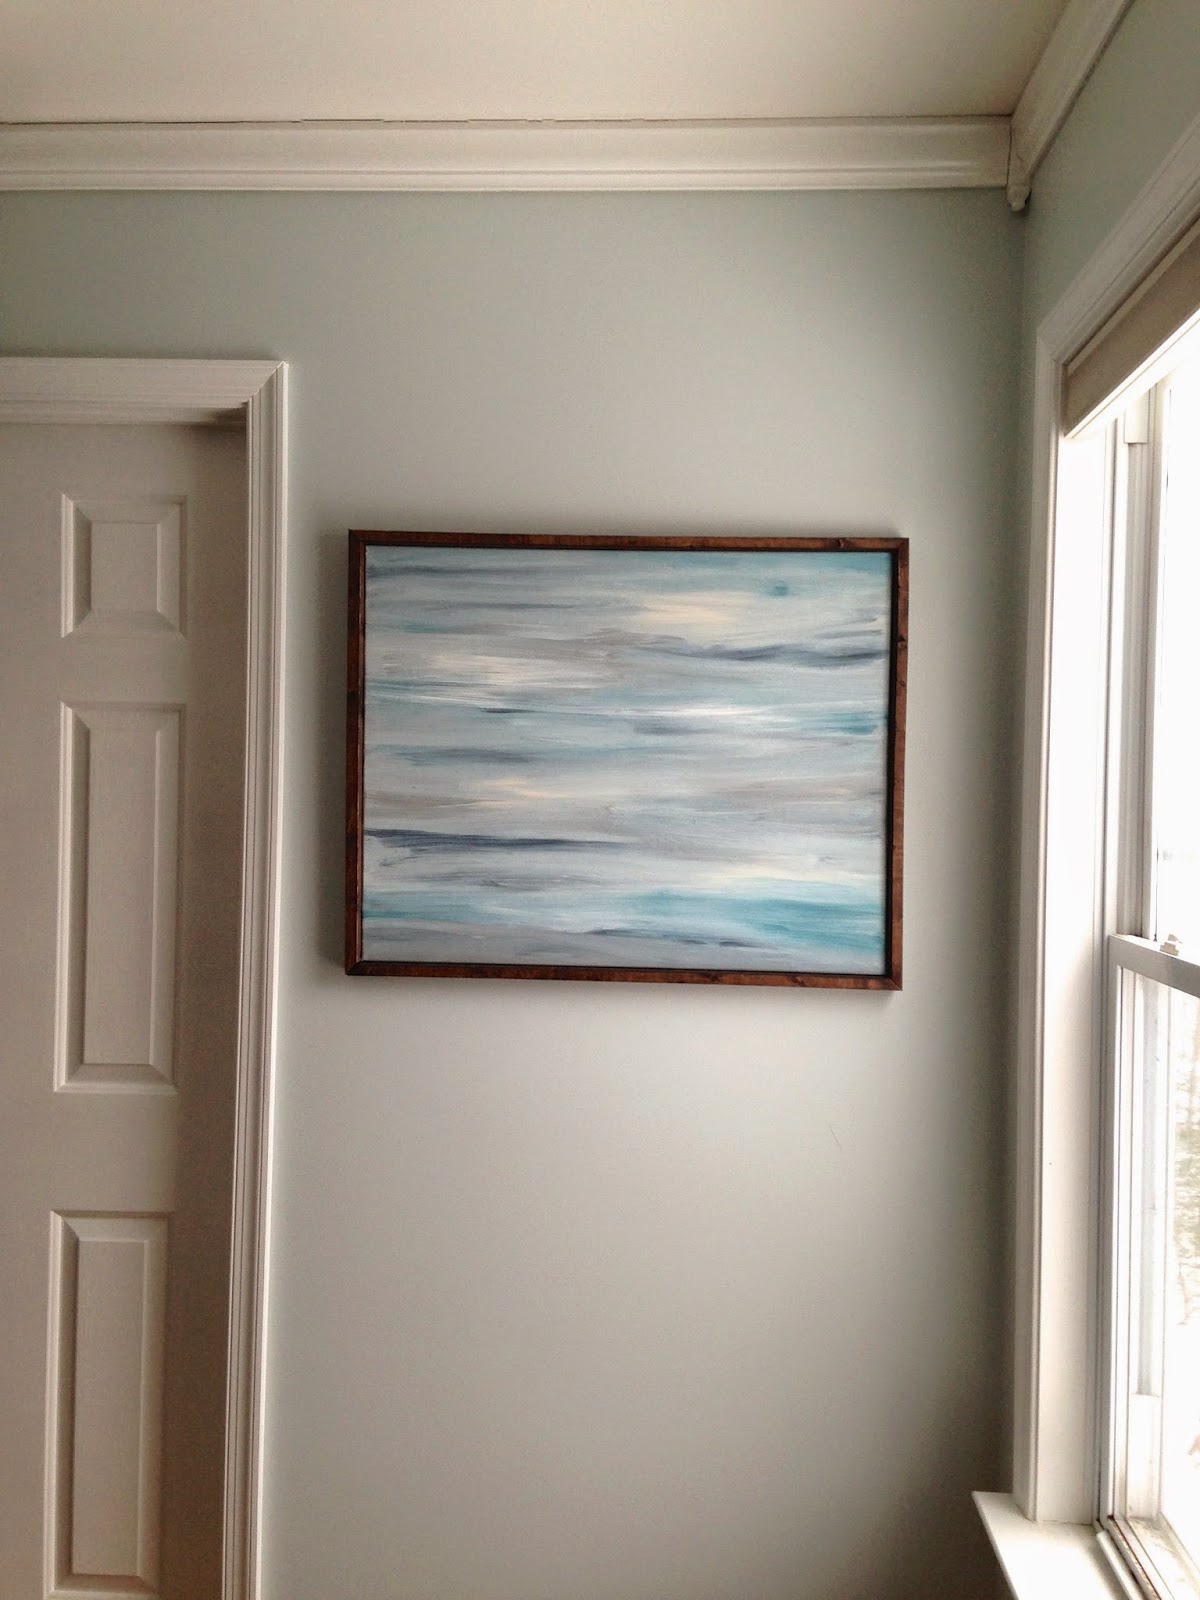
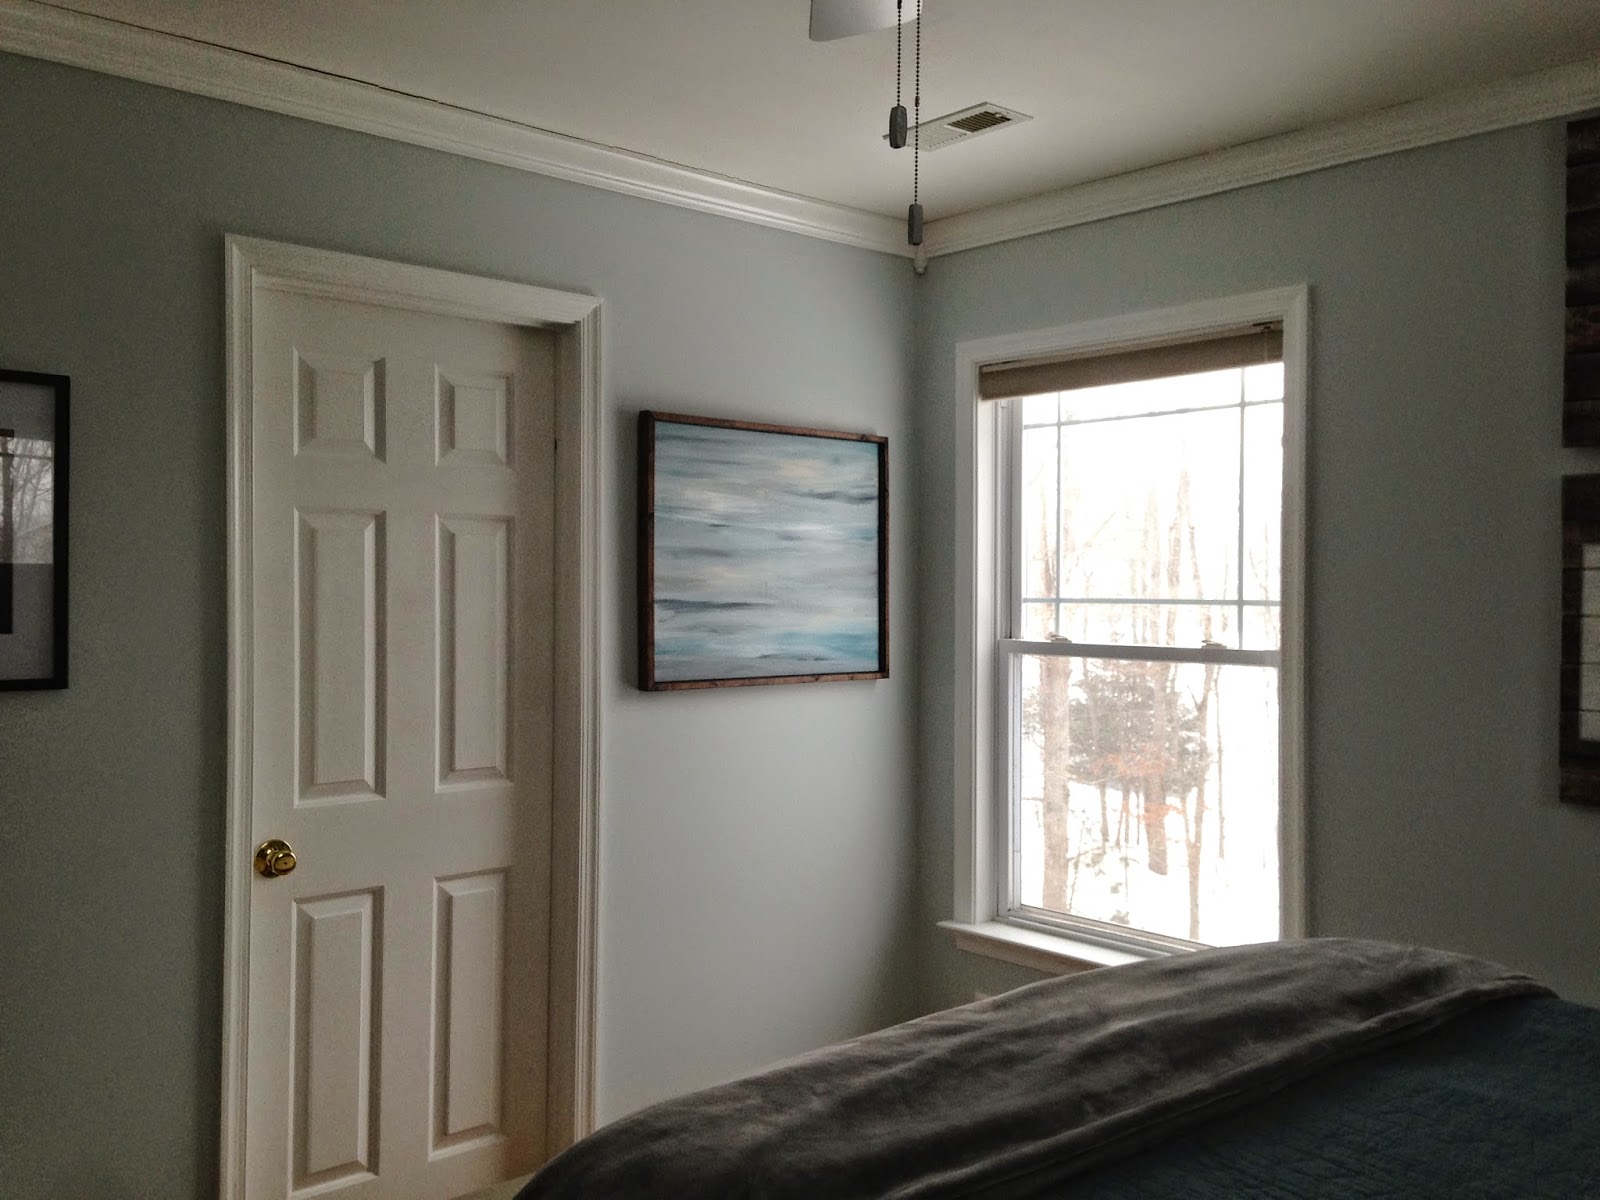
I've seen similar projects on several blogs and decided to give it a try so I'd have something to put on the wall in our bedroom between the bathroom and the window.

I found a 2-pack of 24"x30" stretched canvases at wallyworld for $15. I was going to look for an old painting to paint over at Goodwill, but I haven't had good luck finding useable pictures or frames there, so I jumped on the 2-pack.

I started by painting a coat of gesso to prime the canvas.

Then I dripped, well glopped, paint leftover from various projects on the canvas. If I do this again, I would definitely use less paint. Once the paint was on the canvas, I brushed back and forth until I was happy with how it looked.


I think that brushing on one color at a time would probably work the best. I glopped all my colors on at once, then started brushing back and forth. Because of the delay in getting to some of the paint, I have dried drops and splotches that show under the paint. It's just the texture showing through, but they're there. I haven't decided yet if that adds character, or just shows how clueless I am when it comes to painting. Probably the latter. Good thing I'm not doing this for money :)

It's rather abstract, but I like the colors, and it will bring some color to our bedroom wall. The more I look at it, the more I think it looks like a stormy sky above the ocean.


While the painting dried, I cut a 1x2, then stained it and nailed it to make a frame for the painting. I also screwed two screws into the back of the canvas frame and ran wire between the screws. The last step was to hang my masterpiece on the wall.


Like a lot of my projects, it's not perfect, but I do think it turned out well. Though as I'm looking at these pictures, I think it may be a bit too large for that particular space, so I may move it to another wall in our room. Decisions, decisions.

Monday, February 16, 2015

10 Miles on the Treadmill

we're finally getting some snow! possibly as much as 10" by midmorning tomorrow :)

Friday was my 10 mile run, which I did on the treadmill again- it's just easier with our current schedule. I did get a little bit crazy with the timing of it though. I had a chiropractic appointment scheduled for 11:30 and since they're only open in the mornings on Fridays, I couldn't change to a later appointment (I tried). I thought about doing my run after we got back, but decided that an adjustment after a long run would feel good. So I woke up super early and spent almost 3 hours on the treadmill before making breakfast for the kiddos and getting cleaned up for my appointment.

Getting up so early meant I didn't eat breakfast first, but I did eat ShotBlox throughout the workout, and I didn't have too many issues with my energy levels, which surprised me. I'll have time to eat before I run the half in April, but it's good to try different things.

I followed my usual plan of warming up by walking for 10 minutes and then started my workout by running for 30 min, walking for 5 min, running for 30 min, walking for 5 min, running for 30 min, walking for 5 min, running for 37:25 and then cooling down for 11:40 minutes. I completed 10 miles in 137:25 min and walked another 1.1 miles while warming up and cooling down, so my total for the day was 11.1 miles. I used my walking breaks to eat 1 or 2 ShotBlox and wash them down with sips of water and gatorade.

Every week I think I'll just take it easy, but honestly, it's easier to run faster than slower on the treadmill. It feels like less work, somehow. Whatever the reason, I've actually been speeding up as I add mileage each week. Last week's pace was 14:46 min/mile, but this week I was able to speed things up to 13:44 min/mile. My actual race pace needs to be at least 13:39 in order to finish in 2 hours and 59 minutes or less, so I'm getting closer to where I need to be. Of course, I'm taking all numbers with a grain of salt since I have no idea how accurate our third-hand treadmill really is. But I do know that I am increasing my distances and pace and acclimating my body to working hard, so I should be ok.

Monday- treadmill run
Tuesday- treadmill walk
Wednesday- treadmill run hills
Thursday- treadmill walk hills
Friday- treadmill distance run

My total mileage for the week was 18.34 miles, which is an improvement on last week.

I thought about hitting the treadmill for a few minutes on Saturday just to walk, but the sore throat I had Friday morning (not bad enough to interfere with my run, but I wasn't feeling so great later on) morphed into a full-on cold and I decided to sleep in a bit instead. I'm feeling better today, but still not wonderful.

-------------------

Because I'm doing a half marathon with a three hour time limit when I'm 25 weeks pregnant I've been putting way more effort into actually training and preparing for the half than I usually do. In the past I usually manage just one 7 or 8 mile long run, along with some 2-3 mile runs. I really do under train. Though when you factor in the amount of time I've been spending on my weekly long runs, I'm reminded why my long runs have suffered so much in the past. I just haven't had the time to do them. Of course, my times haven't improved as much as I'd like, either.

Training time is still an issue, but it comes in behind the need to physically be able to finish 13.1 miles in less than 3 hours while 25 weeks pregnant. Hence the diligent training. So it's been good motivation and I'm really curious to see how it affects my actual performance.

---------------------

I've also taken the opportunity to switch things up a bit with my clothing. I've run enough races that I know what generally works and doesn't work for me, but my changing pregnant body has required some clothing changes as well. I've learned the hard way that I really need to find a bra without an underwire to wear under my sports bra - I have the tender ribs and the friction sore to show that an underwire, though supportive, just isn't working right now. And my maternity support belt needs to be under my shorts, not on top where it will slide around and not stay in place. I did a lot of tugging and adjusting on Saturday. But it's much better to find this out on a shorter training run than during an actual race when I should be focusing on keeping my pace up, not tugging clothing into more comfortable positions.

I'm eyeing this shirt from fortwofitness.com. It's pricey, but would be a great memento from how active I am during this pregnancy. I want to either paint or add vinyl to the back that says "25 weeks pregnant". I'd wear it for the half marathon, and then for subsequent races, I'd cross out the number and write in the updated number, ending with 38 weeks when I do the Fourth of July 5k. I may order is sooner so I can start wearing it sooner though.

Sunday, February 15, 2015

Sunday Funny

River has hit that delightful stage where he wants to do what his big sister does. He likes to follow her around and copy her. Luckily Sunshine thinks it's cute and doesn't complain.

She's taught him how to hide and now River will hide in the closet or behind a bed, usually when I'm trying to get him ready for bed. Sometimes he's quiet and it's hard to find him, but other times his body is easily visible or he's giggling. He's definitely got a mischievous streak going.

When I built our bed, I made it high enough to store our bins and trunks underneath. A side benefit: Sunshine and River have discovered that it's a great hiding place.

The other day Sunshine was sitting on the kitchen floor doing her Latin workbook. River saw her and decided he needed to join her. I peeked around the counter and saw this cuteness:

I hope this lasts and they don't grow out of being buddies.

Thursday, February 12, 2015

Toddler Vest from a Wool Skirt


A few weeks before Christmas I realized River had outgrown the vest I made him from a pair of pants. We could still button it up, but it was too short to cover his buddha belly. I was expecting this to happen (he is a growing toddler after all), so I had purchased a blue wool skirt at the thrift store to use for his next vest.

Since he is a little boy and the vest will get dirty, I ran the skirt through the washer and dryer to pre-shrink it. Washing and drying also felted the wool a bit, which gives it a little thicker texture than it had before. Perfect for wintertime, I think. When I wash it in the future I will probably let it air dry to prevent further shrinking and felting. The skirt was lined, so I used that lining for the vest lining.

I used the same pattern and tutorial I used on the first vest I made River. I didn't shorten the length this time since the original pattern is intended for one-year-olds. I did adjust the angle at the neck again to give a deeper "V" and turned it into a 3-button vest.


I put the vest together a little differently than last time, mainly because I was hurrying and didn't want to mess with things more than I needed to. When I sewed the lining to the wool at the arm holes and neckline/front edges, I serged them with right sides together, which hid the seams when I turned the pieces right side out. That was the same. What was different was when I sewed the front pieces to the back- I didn't attempt to hide the side and shoulder seams like I did last time. I just serged the seams on the inside and then tacked the edges of the seams down with needle and thread so they wouldn't show too much at the edges.

Even with the spot of hand sewing, the vest only took a couple hours from start to finish. And River is looking handsome in his navy wool vest!

Tuesday, February 10, 2015

States Artwork


I've been hanging pictures and art on the walls of our house lately. We've only lived here almost four years, so it was about time.... Some art we had, but I'm making other pieces to fill in some of the blank spaces. I saw some states artwork here awhile ago and thought it was a cute idea that I could easily replicate.

Of course, I did things a bit differently, but followed the basic idea of the original. I only made four pieces, focusing on the four states we've lived in since getting married. I used 1x4 furring strips that I purposely chose for their "rustic" look, i.e., natural imperfections and roughness. Mine ended up being about 22" by 24", but I probably should have gone a little smaller.

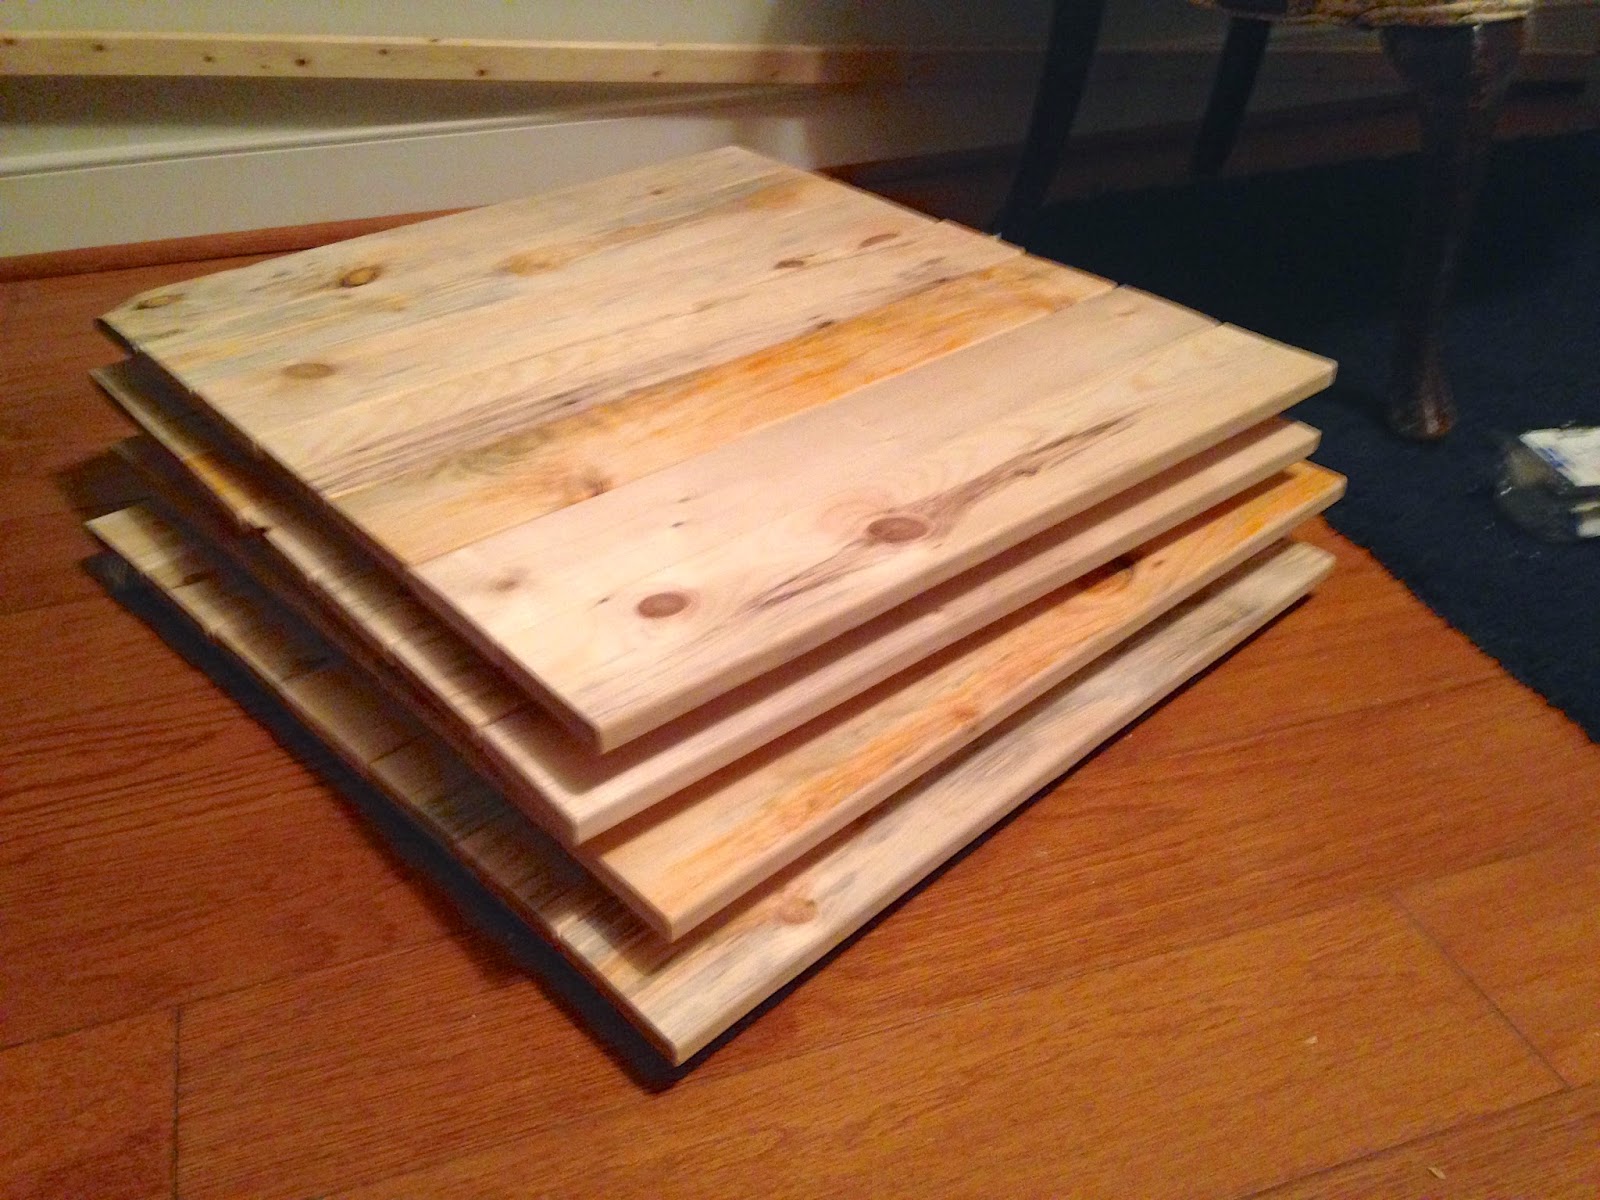
After cutting each piece to length, I arranged them how I wanted them to look, then flipped them over.

I applied some wood glue, then used our nail gun to staple scrap 1x2s to the back to hold all the pieces in place.

 A few minutes later, I had all four pieces ready to go.

I first stained them with weathered gray stain, but it wasn't quite gray enough for what I had in mind.

I layered some Kona stain on top of the weathered gray, which gave me a better finish.

A few minutes outside with the palm sander, and each piece looked nicely weathered. I was surprised at how the gray stain ended up being more visible than I thought it would be. The picture below is the best example of it. (and a gratuitous adorable toddler photobomb)

After sanding the wood, I found some state outlines online and enlarged them to use as stencils. Colorado could have been a little smaller, I think. It didn't need to take up quite so much of the wood. Oh well.

Despite my efforts, some paint still seeped under the edge of the stencils. This one isn't too bad, but there were several spots on each state that were too obvious to leave as-is.

After some thought, I decided to outline each state with a silver paint pen. I found a wide chisel tip pen that worked really well and gave a nice wide outline.

Depending on the light, the silver isn't super noticeable, but it does make the edge look a lot better. I lightly sanded each state and then called it good. Overall, I'm happy with how it all turned out, though if I had it to do again, I would make the changes I mentioned earlier (smaller pieces and smaller Colorado outline).

This is a fairly easy, inexpensive project. I only bought a few 1x4s, the weathered gray stain, and the silver paint pen. I had the kona stain, the white paint, the scrap 1x2s, the screws, and the wire.

I put a couple screws and some wire on the backs of each piece.

And then hung them on the wall. This is where I realized I really should have made them a little smaller. I wanted something nice and big to take up that big empty space, and they are nice and big, but I'm not sure about the current arrangement. And Colorado really should have been smaller. Too late now though.

I really can't lower them any since they'd be too close to the level of the mattress then. I almost hung them in a line straight across, but there'd only be an inch or so in between each. I may still do that though.

What do you think? Leave as-is or rearrange?

Monday, February 9, 2015

9 Mile Long Run

River enjoying his first time in a small ball pit at a birthday party we went to not too long ago


These long runs really drain me. I guess being pregnant might have something to do with that :)

Last week I was exhausted all Sunday, despite getting a good night's sleep Saturday night. Monday I felt a lot better, but my legs were still pretty tired when I got on the treadmill.

Because I was so non-functional last Sunday (and we had a busy day planned for this Saturday), this week I moved my long run to Friday in the hopes that I would be able to handle everything better. It did make Friday feel like Saturday, but I was able to get the things done that I needed to on Saturday and was completely functional at church on Sunday. So definitely a win, and I will probably continue to do my long runs on Fridays. I missed Wednesday and had planned on making it up on Saturday, which of course didn't happen, so I need to make sure I'm getting my weekday workouts in so Saturday and Sunday can be rest days. I'd prefer to hit the treadmill 6 days a week, but I think my body needs the extra rest day.

Monday- treadmill run
Tuesday- treadmill walk
Wednesday- busy day, so I skipped the treadmill
Thursday- treadmill walk
Friday- treadmill distance run
Saturday- busy day, so I skipped the treadmill

My mileage for the week was 16.54 miles, which is about 2 miles less than I was aiming for, but since I skipped two days it's pretty good.

My long run started with a 10 min walking warmup (0.45 miles), then I ran for 30 min, walked for 5 min, ran for 30 min, walked for 5 min, ran for 30 min, walked for 5 min, and ran for 28:08 min. I ended with a 12:16 min walking cool down (0.65 miles).

It took me 118 min of running and 15 min of walking (133 minutes total) to reach my 9 mile goal. My warmup and cool down added 1.1 miles, for a total of 10.1 miles for the day. My pace for the main workout was 14:46 min/mile, which is getting closer to where I need it to be. Since I seem to run faster outdoors than on the treadmill, I'm not too worried about my pace. I do seem to be speeding up a bit though. I didn't figure out my pace last week since I wasn't completely sure about my timing, but the week before my pace was 15:55 and the week before that my pace was 15:30.

I've been wearing my support belt when on the treadmill, but even so my uterus hasn't felt right. I'm not sure if it's loose ligaments or what, but it's uncomfortable and a bit painful. I decided to try my postpartum binder to see if that would hold things in place better while the baby's still small enough to have extra room.  Running was more comfortable this week than last week when my uterus felt like it was jostling around, but the binder did constrict my breathing a bit. I guess that's good practice for when the baby's bigger and my lung capacity is reduced anyway. I also remembered why I only wore the postpartum binder for a day or two after River was born- it rolls down and doesn't stay in place. Luckily it was the lower portion I needed to stay in place, and with my support belt on top of it, everything felt supported and good.

I will say that while I'm physically tired, my food isn't as much of a problem as it has been. I feel like I'm fueling properly to give me the energy I need. What's made the difference? I still limit grains as much as possible (they don't agree with my stomach) but I've started eating a small amount of potatoes every morning and occasionally for dinner. It's more starches than I've eaten in the past, but so far it's agreeing with me. Which is nice, since potatoes have given me problems in the past. In any case, I'm apparently getting the carbs I need since I'm not feeling drained like I have in the past. There's a difference in being worn out after a hard workout and having no energy because my food intake isn't working for me. Right now it's working for me. Now if I could just back off the chocolate a little (yeah, it tastes fine now and I've started eating it again, unfortunately).

I wore my compression socks all day after I finished my workout on Saturday, and wow, what a difference they made! They supported my legs and my muscles never felt sore despite the beating I put them through. I ordered another pair of compression socks with the gift card I received and I will definitely be putting both pairs to good use.

Sunday, February 8, 2015

Sunday Funny

As everyone with kids knows, each one is different. We've definitely seen that with our two kiddos. Sunshine has always been our little snuggle bug- even now she loves her snuggles. River, on the other hand, is so un-snuggly it's funny. Even if he hurts himself he doesn't want a hug to be consoled. The only time we've been able to get snuggles out of him is when he's tired and we're putting him to bed. Then, and only then, will he deign to lean his head on our shoulder.

Lately though, he's started spontaneously giving us hugs. He'll put his arms around my neck after I get him out of bed and he'll attack our legs and hug them.

In fact, I managed to catch River in the act of attacking Sunshine:

Friday, February 6, 2015

Shredder Coverup


Some months ago I built a box to store our our shredder. At the end of the original post, I was still trying to decide where to keep it and whether to add handles and caster wheels.

I did add the handles and wheels, and the box has been shuffled from one side of the library to the other. As we've lived with it and I've thought about it, I decided the box needed a lid. River likes to pull out the unshredded junk mail and scatter it across the floor. And the box has been sitting next to the chair, so it would be a good side table if it had a lid.

I cut some 1x4's a few inches longer than the box, leaving a lip on all sides. Then I used our Kreg jig to attach the pieces to each other. I also cut a 1x2 to make a rectangle just smaller than the inside of the box. I attached the 1x2 rectangle to the underside of the lid with our air nailer and wood glue.


checking the fit one last time

The last step was staining the wood. I applied a couple coats of Kona stain (the same color I used on the dining table and benches and sofa table), then gave it a good coat of clear wax. I split the different tasks across several days, but I could have easily accomplished everything in a couple hours if I'd had that much time available at one time.

Now we have a lid that's easy to remove and easy to put in place. I thought about putting a table lamp on top, but that would make it a lot more difficult to actually use the shredder, so the lid will stay uncluttered. Instead, I'll find a floor lamp to put between the chair and the box.


It's still an odd box in the library, but at least it's now a useful odd box in the library where we can rest our books and water bottles :)  And that chair will soon look a lot less shabby and worn...


Wednesday, February 4, 2015

Homesteading Thoughts

I'm in the middle of finishing some projects to share, but in the meantime I thought I'd share some thoughts that have been running around my head lately.

We know we want to move somewhere we can buy acreage and have a mini-farm/homestead/hobby farm/whatever you want to call it. There's lots of places we wouldn't mind living, but there's no job opportunities for Mr M near most of them, so they wouldn't work. However, we have finally found a place that actually has job prospects for Mr M, and land isn't too expensive. The only problem is that there's not a lot of job openings, so we have to wait till one opens up.

In the meantime, I've been doing research (of course- my OCD loves to over-think things) and have come across many homesteading blogs that say start where you live, even if it's not the perfect place you had in mind.

I've seen similar posts several times now, and it got me thinking. Why aren't we doing more right now? Actually, it's not too hard to come up with multiple reasons.

  1. I'm pregnant. And yes, I am using that as an excuse. I'm not planting a garden while 6 months pregnant, and I'm not weeding it while 9 months pregnant. Just being realistic here.
  2. We only have one corner of the yard that actually gets any amount of consistent sun (and I have my doubts about it being enough for some plants), and that corner had a tree fall on it last year. The chances of that happening again are very slim, but it still makes me wary.
  3. We've actually considered getting a feeder pig or two, with the idea of rotating them around the treed parts of our property (acorn-fed pork is supposed to be super tasty!), but the fences would have to be moved every couple days. Not normally an issue, except I'm pregnant (yep, playing that card again). That's not the real problem, though. We don't have a dog(s) to protect the pigs and scare away predators. Bears have been seen in our area, so predators are an issue.
  4. We could get some chickens, and this one is the one we're closest to doing. We want to have pastured chickens, but we don't have a pasture, so we'd have to run them through the trees. So fencing and predators are an issue with them as well.
  5. We have no idea how long we'll be here given Mr M's current job situation. Even if we do stay here, Mr M may have to work out of our area for awhile. Tasks that would be manageable with him around would be overwhelming with him gone and me caring for three kiddos. And it would be our luck that we would finally get started on one of these (garden, pigs, and/or chickens) only to have to move before the season is over.
So that's what's been running circles in my brain. Any suggestions or encouragement on how to make it all work?

Monday, February 2, 2015

8 Miles on the Treadmill

the "BIG STORM" early last week proved disappointing in our neck of the woods

Last week was a pretty good workout week.
Monday- treadmill speed
Tuesday- treadmill walk
Wednesday- treadmill run
Thursday- rest day since I had to go to the DMV to register our new car (we lost track and waited till our temp tags had almost expired- oops!)
Friday- treadmill walk hills
Saturday- treadmill long run

There was a Scout recharter workshop Saturday morning followed by a birthday party in the early afternoon, so I didn't get on the treadmill until late afternoon. This did not give me enough recovery time before church the next morning- I was exhausted all day Sunday, despite getting a good night's sleep. I'll have to be more careful about when I do my long runs since I need to be a lot more on top of things at church. River must have picked up on how tired I was, because he was all over the place.

I started with a warmup walk for 10 min (0.45 miles), then ran for 30 min, walked for 5 min, ran for 30 min, walked for 5 min, ran for 30 min, walked for 5 min, ran for 9 more min, then ended with a cool down walk for 13 min (0.55 miles).

It took me 99 min of running and 15 min of walking (114 minutes total) to hit 8 miles. My warm up and cool down added another mile, for 9 miles total. 8 miles in 114 minutes is only 3 minutes more than I took to run 7 miles last week. I'm not convinced I ran faster, so perhaps my time and/or distance was a little off.

Our third-hand treadmill is having problems and we'll probably need to replace it soon. The fuse/ breaker/something that makes it stop working popped three times during my workout (it did once before the week before last, and Mr M has had problems with it too, but never this many times in one workout). Every time the treadmill died I had to guess at what my time and distance were at and then figure out how much more I needed to do. So I may have been a little off. Or maybe I really did run faster- I did feel pretty good while running.

Either way, the treadmill is getting annoying, but since we only paid $50 on craigslist 3 or 4 years ago, I can't complain too much. We've definitely got our money's worth, but I hate to have to go through the hassle of finding a reliable replacement.

My total mileage for the week: 17.08 miles, about 1 more mile than last week's total.

Last week I mentioned that I was trying out some compression socks. Back in December I won a pair of compression socks and a gift card from Hylete during the 12 days of Christmas giveaway run by Vacation Races (they're the ones who organized the Great Smoky Mountains half marathon that I ran in September).

I've thought about trying compression socks for awhile now, but I've always been too cheap to buy them, and there's so many options- which to choose? Since I got some for free, I finally got to try them out and see if I like them.

I first wore them while walking and they felt supportive, but not restrictive like I was afraid they would. I then wore them while running short distances on the treadmill. They felt a bit restrictive, but they also helped with the sporadic calf pains I've been having. I haven't been brave enough to wear them on a long run yet, but I have worn them after my workouts. Post-workout is actually my favorite time to wear the compression socks since they make my legs feel so much better! They decrease muscle fatigue and reduce pain, which leaves my legs much less sore then they would be otherwise.

Have you tried compression socks? Do you like them? Hate them?