
We purchased the materials in three separate batches since we were dealing with a fairly significant amount of weight. The second and third batches each weighed around 1200-1500 pounds, which is all our trailer and CRV can handle.
The first batch of materials was the paver base and several blocks so I could make sure everything fit properly.

the rough outline of where I need to start digging for the base of the fire pit

River helped push the bucket as I pulled it, and was so proud of himself for helping

paver base area dug, leveled, and back-filled

layer of sand on top of the dirt (we had the sand already and didn't need to purchase it)

pavers in place and leveled
the inner section isn't as level because the fire pit shell won't be resting on it

solid and level base to build the fire pit on
This was the hardest part, as I expected. We don't have dirt, we have clay, and it's a pain to dig up and an even bigger pain to try to level. I ended up getting it close to level then back-filling with some dirt Mr M had dug out while working on the shed ramp (all the leaves and vegetation had made the dirt a little better than the clay by the patio). Back-filling with dirt made it a lot easier to get a level surface.
Adding to the level of difficulty was the high heat and humidity. I was dripping sweat and had to keep stopping for breathers. It sucked, but I got through it in less than an afternoon.
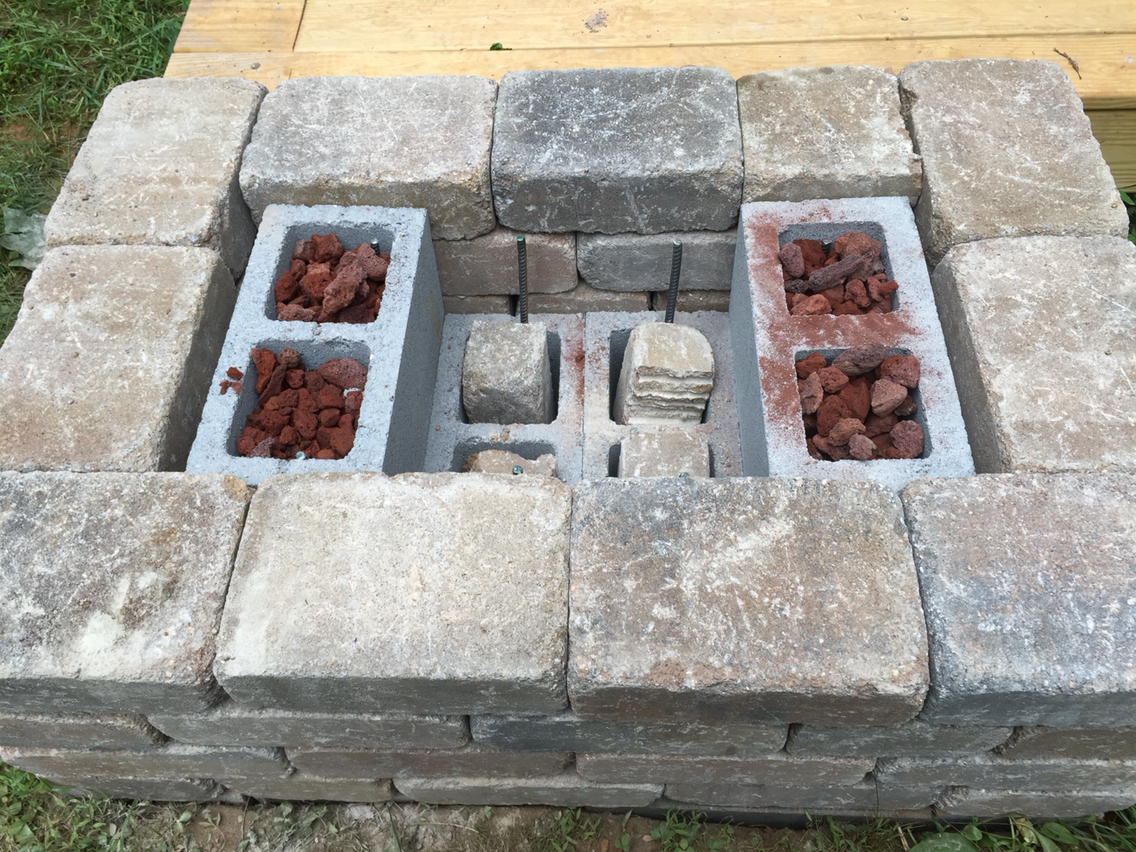
The second batch of materials was the cinder blocks for the interior and half the blocks for the outer shell of the fire pit. We also purchased 2' lengths of rebar, a masonry drill bit, 2 tubes of landscaping adhesive, and two bags of lava rock.

I drilled holes through the center pavers, then hammered in rebar to hold the cinder blocks in place.
this is where I realized I can't count and needed two more cinder blocks.

once the cinder blocks were in place, I started stacking the blocks for the outer shell, gluing in place with landscape adhesive

I filled in the cinder block holes with lava rock, but it took one bag to fill the holes for one stack, which was more than I thought it would take

half the blocks we needed allowed us to build up four rows, which is just above the level of the patio
this is another area I mis-measured: each row has a block that had to be cut down to fit
Mr M was kind enough to stop working on the shed ramp and take over drilling pilot holes (very tedious) so we could split the blocks to fit the space. I put the leftover pieces in the cinder block holes, which meant the lava rock only needed to be in the very top portion of each hole.
Drilling the holes for the rebar was tedious and our rechargeable drill batteries didn't really appreciate all the work I was asking them to do, but they got the job done. When Mr M drilled the pilot holes to split the blocks he pulled out our heavy-duty corded drill, which did the job a lot better. The only problem was that the drill bit was definitely on the duller side by then. I was skeptical of the adhesive being effective, but it actually does work and holds the blocks in place. Stacking the blocks went pretty quickly, the long part was all the drilling. Even then we were able to finish this portion in just a couple hours.
I decided to put cinder blocks in the center for extra support and stability and to raise the interior floor. The fire pit is tall enough that it would be awkward and problematic to have the fire clear down at the bottom. Two layers of cinder blocks raises the interior floor about half way up the height of the fire pit.
The third batch of materials was two more cinder blocks for the interior (since apparently I can't count or measure) and the other half of the blocks for the fire pit shell. We also purchased three more tubes of landscape adhesive and two more bags of lava rock.

six rows of blocks in place

center cinder blocks in place, leftover block pieces in the cinder block holes under the lava rock

two bags of lava rock on top of the cinder blocks

finished fire pit
This portion of the project only took a couple hours since it only consisted of splitting four blocks, finishing off the lava rock filler, and gluing the last four rows of blocks.
We had some pretty torrential rain the night before I finished the fire pit, so while I waited for the blocks to dry out (we had to wait for the sun to clear the trees and actually hit the fire pit) I worked on splitting the four blocks I'd need for the four remaining rows. Mr M drilled all the way through each block he did, but I was too lazy, impatient, tired, sweaty, (pick your adjective...) to do that. Plus my hands are too small to comfortably hold down the power button on the heavy-duty drill, which is in an awkward position, so it was hard to keep the drill on for any length of time. I drilled in an inch or so and then took the four pound hammer to the blocks. His method was neater, but mine was quicker and less work :)

drilling holes in a straight line is harder than it looks

after drilling, I hammered along the line of holes, then along the line on the short side, then along the line on the back. this shows the back of the block

and the front of the block

three of the four blocks I split- you can see how far I didn't drill into each one
because my lines weren't super straight, I used the hammer to knock off the worst of the uneven edges
since all the blocks have rough corners and knocked-off bits, it didn't matter if I wasn't super neat with my splitting and clean-up

one of Mr M's {neater} blocks. it still needed some whacks from the hammer, though
I thought about placing thinner cap pieces that are wider than the rest of the blocks on the top row of blocks, but our local Lowe's didn't have them in the right color, so I didn't. I think it looks fine as-is, but if we find cap stones in the right color, we may add them just to make it look a bit more finished.
All told, this project was completed over the course of three days last week, working a few hours each day. After the patio and treehouse, this was positively speedy! If the weather wasn't so hot and muggy, we had all the materials gathered ahead of time, and we were both working on it, we could have finished this project in one longish day.
Materials:
We ended up using 88 Ashland Olde Manor retaining wall blocks to build the fire pit itself, 8 cinder blocks for the center support, and 12 pavers for the base. 5 tubes of landscape adhesive, 4 bags of lava rock, 8 two foot lengths of rebar, and a masonry drill bit rounded our our purchases. We also used a bag of sand as paver base.
I like the gray color of the Allegheny Olde Manor retaining wall blocks, but in person I thought they looked a little too much like roughed-up cinder blocks. Since that wasn't the look we were going for, we went with the brown tones of the Ashland Olde Manor blocks. There's still some gray tones but the major color scheme is brown, and I think the overall result looks nice and will look good with the patio once we stain it.
---------------------
The blocks aren't supposed to be stacked higher than two feet, but the fire pit ended up a little higher than that. I figured it was ok since it's in the shape of an interlocking rectangle, rather than a retaining wall that could fall over. I wanted the extra height because of little boys:

While standing on the ground, there's no way River could fall in, and even while on the patio he has to stand on tippy-toes to look in. If we stay here and don't end up selling the house we'll have another little boy running around eventually, so taller is better.

the new view from our patio: treehouse, yard, trampoline, and fire pit

The emphasis on safety and compliance is important. Licensed teams such as Progressive Licensed Landscapers ensure proper standards.
ReplyDelete