

This shelf came about as a solution for a couple problems we had.
Problem one:
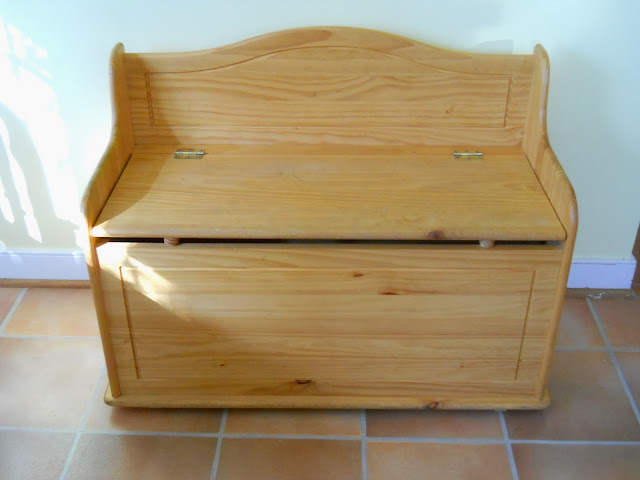
We had this bench for a number of years and used it to store our shoes. However, it was too wide and took up too much space in our small dining area.

Problem two:
When we started homeschooling, I intended to have our school room in the basement. Unfortunately, the lighting isn’t great- the windows face north and west, so sunshine doesn’t come in till late afternoon. Not ideal. Instead, we found ourselves doing schoolwork at the dining table, next to the giant window with lots of natural light (I need my sunshine!). So we needed a space near our school area to keep our books and school supplies close at hand. We kept them in the library for awhile, but it was annoying to have to get up and walk into the next room to retrieve something we needed. Guess I’m just lazy in that respect :)
The solution to the two problems:
The original purpose of this shelf unit was part shoe bin, part homeschool supply shelf (as you can see in the first photo). The lower two shelves would house the shoe bin portion, with each opening having a pull-down door. The top two shelves would remain open for access to books and things.
I built it a year and a half or so ago, when I did a building blitz and built and painted several projects all at once. I didn't install the doors immediately because I was waffling between installing drawers or drop-down doors. So we moved it upstairs and started using it while I made up my mind.

Before I got around to building the doors though, I decided that I was tired of doing school at the kitchen table. It worked ok while Mr M was out of town for extended periods of time, but now that he's home a lot more, it just wasn't working. There was always papers, books, crayons, and computer stuff scattered all over the table. We could no longer just push things off to the side and still have room to eat meals. Plus the constant clutter was annoying.
So I came up with the homeschool cupboard. Not only would it keep all the school paraphernalia off the kitchen table, it would provide storage space for all the books and other school materials. This freed up the top two shelves of the shelf in the kitchen for other uses. The top shelf would be for baskets of mittens, keys, and the other detritus that always needs to be close to the door. The second shelf would become another space for shoes. We do wear shoes in the house - Mr M and I both wear orthotics and it's better for our feet to wear shoes than to go barefoot - but we keep most of our shoes by the kitchen door.
Once I made up my mind to change things up, I held off adding the doors until I was ready to build the homeschool cupboard doors. Then I built all of them at once. In the meantime, the shelf sat in the kitchen, looking like this, until I could finish the homeschool cupboard.


I built the doors for the shoe bin the same as the homeschool cupboard doors: 1/4" plywood glued into channels cut into 1"x3" boards and held together with pocket holes made with my Kreg jig.


Then I drilled holes and attached the door pulls. I found them at Target and I love them! Aren't they so cute? The label space is super handy for helping us remember whose shoes go where.

I attached two hinges to the bottom of each door, then screwed them into the shelf. Then I attached the magnetic catch to the roof of each cubby area and checked to make sure the alignment was correct (door not too far in or too far out).


Eventually I'll paint the doors white to match the rest of the cupboard (don't need to think about that one like I do the other projects I've built), but my project time is pretty limited right now since TLM is convinced he needs to sleep on me, rather than in his bassinet. Enjoyable, but not productive :)

bins for Dad, Mom, LMS, TLM, Hiking Boots, and Water Sandals
And to keep the top from collecting clutter, I put some Christmas decorations up. My goal is to change this seasonally. That is not a strong point for me, so we'll see how it goes :)

No comments:
Post a Comment