

River's Jawa costume came together pretty quickly, but it did require a little advance planning for part of it. It consists of four parts: the robe, the bandolier, the bag, and the hood with eyes.
1. The Robe
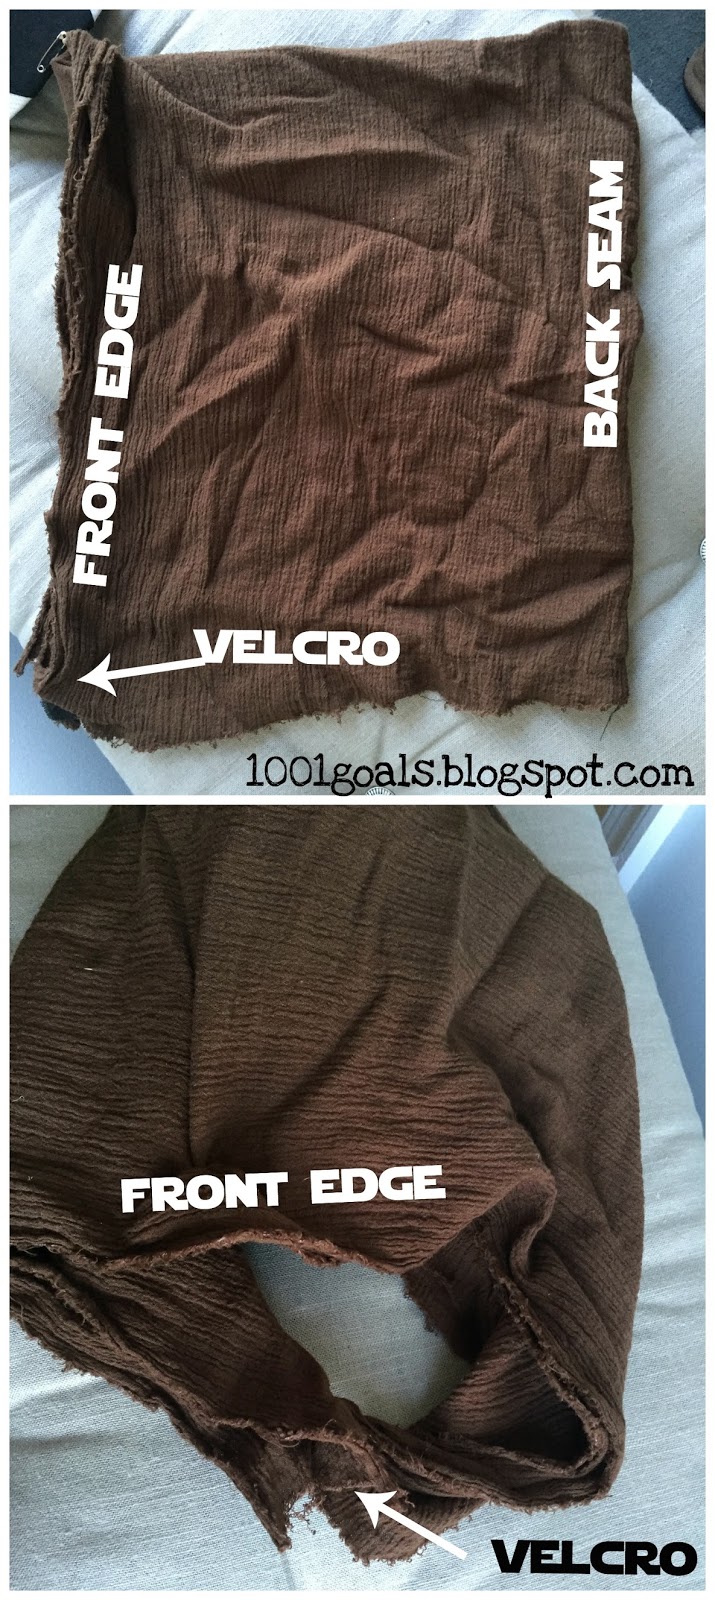
I wanted to use a rustic, loosely woven fabric, but couldn't find any. I ended up using a double layer of the crinkly gauzey fabric I used for part of my Jedi costume last year, and it turned out fine. I found a tutorial on instructables that advocated using a tube for the body and tubes for the arms. That didn't really work for River since he's such a tiny little guy, so I ended up just making a loose robe by cutting the shape on the fabric. The seams run up each side from the hem to the armpit to the wrist. I put a cut in the back of the neck and sewed some ties to it to keep the robe on.2. The Bandolier
I used some of the black vinyl that I used for Mr M's boot gaiters to make the bandolier. The vinyl wasn't horrible to sew if you were sewing with the right sides together, but it still wasn't super neat. I sewed a long tube for the strap and made 3 little pouches that I sewed to the strap. I even added velcro to hold the flaps in place. The vinyl was a pain to work with, but I'm pretty happy with how it turned out.


3. The Bag
I'm not sure if Jawas actually carried bags, but I thought it fit in with the costume and it gave him a built-in trick-or-treat bag. I used more of the icky black vinyl and made another tube for the strap and a larger version of the little pouches I made for the bandolier. I didn't add velcro to this one though.


4. The Hood with the Eyes
This is the part that I'm particularly pleased with and it's also the part that required advance planning. I found some pet collar lights on Amazon to use for the eyes. They come in several colors, and I went with red. I purchased three just in case one of them didn't work, but they all worked fine. They shipped from China, so it took a while (3-4 weeks if I remember correctly) to arrive. Hence the need to plan ahead.
The hood itself is basically a rectangle folded in half and sewed into a peak. I put velcro on the front corners since it's supposed to wrap around the neck. The tutorials I found all talked about using a mask of some sort that you cover with black fabric and then attach the lights for the eyes. We don't wear masks, and even if we did, River is two. There's no way he'd actually keep it on if we were able to get him to put it on in the first place.
After some thought, I decided to try placing a baseball hat under the hood for shape and to attach the eyes to. I used a safety pin to keep the fabric of the hood on the hat.


I used a couple stitches to attach the lights to the brim of the hat. There's a button on the back of each light to turn it on, make it brighter, make it flash, or turn it back off. Super easy to use.

We put black sweatpants and a long sleeve black shirt under the robe for warmth. Black gloves would have been a good addition, but I didn't even attempt them since I knew he wouldn't wear them. I thought about making a blaster out of PVC pipes, but I didn't have time and I didn't think River would be able to keep track of it.
This was a fairly simple costume and I'm happy with how it turned out. It wasn't until I was almost finished that I realized that River might not want to wear the hood. He's worn hats before, but like all toddlers a lot of things can be hit or miss. Sure enough, he wanted nothing to do with the hood:

Good thing he's cute :)


doesn't Sunshine look so thrilled here?
We did finally manage to get the hood on him at the ward activity, but he wouldn't let us do up the velcro or straighten out the "eyes".


When we tried pictures again the next day he let us put the hood on him again, but still wouldn't let us do up the velcro. Looking at these pictures makes me think I might have spaced the lights a little far apart. Here's where a cooperative kiddo would have helped, but I still think it turned out great. Though in the first picture below he actually seems to be channeling Emperor Palpatine rather than a lowly Jawa.


This would be a fun costume to do again when he's a bit older and more cooperative. It's a pretty simple build and a re-do would allow me to play with different materials for the robe/hood and bandoliers. If we do a repeat I'll most likely also make a blaster to go with the costume. I had fun making our lightsabers of pvc pipe parts last year and making a Jawa blaster would be fun as well.
Last year's family of Star Wars characters can be found here
No comments:
Post a Comment