

the coop looked like this at the end of week 9
Last week I had 4 work days on the coop and no treadmill time. I also skipped our hike in favor of working on the coop. I'm ready to be done with the coop so any spare time I had went to the coop.
Last week I purchased the roofing materials and linoleum, plus wood (2x2s and a sheet of plywood) for the outdoor brooder. The chicks were two weeks old at the beginning of the week and had already outgrown the two plastic bins in the house, but they still needed the extra protection of a brooder and couldn't go straight out to the coop. The chicks have grown a lot faster than I expected. I know they're only supposed to take 8 weeks to get to butcher weight, but seeing it in action is totally different.
I started the week with the goal of getting the roof on, but changed my mind on Wednesday to focus on the brooder. Before I changed my focus I installed the cross pieces on the rafters to secure the roof panels to and then attached the hardware cloth to the eaves. I also put hardware cloth on the windows. I could only wear gloves part of the time because I found it too awkward to pick up screws and washers with gloves on, so my hands definitely suffered from working with the hardware cloth.

crosspieces on the rafters, hardware cloth on the eaves (with lath securing the lower edge), and hardware cloth on the windows

I put the hardware cloth on the outside because the windows will be hung so they can swing inward
After I changed my focus, I started working on the brooder. I wanted to install the linoleum first, but an afternoon downpour derailed that plan. While I waited for the floor to dry out a bit I built the frame for the brooder.
The next day I laid the linoleum out, which was a pain since I had to work around the brooder- shifting it around as I shoved the linoleum under it. Awkward, but it worked in the end. However, the linoleum I bought was the cheapest available, and it is indeed cheap. I'm curious to see how long it actually lasts.
Why the linoleum? It would be optimal to have a dirt floor in the coop to help the bedding (straw/shavings/etc) break down into mulch, but with the elevated floor that's not an option. The linoleum should protect the wood a bit, but could cause traction issues for chickens. We'll solve that by employing the deep bedding method, so the chickens won't be touching the floor.
I got the inspiration for the brooder from this video, you can see his brooder at the 1:20 min mark, and again at 4:57. We've actually gotten a lot of inspiration from Justin Rhodes and have enjoyed watching his youtube videos.
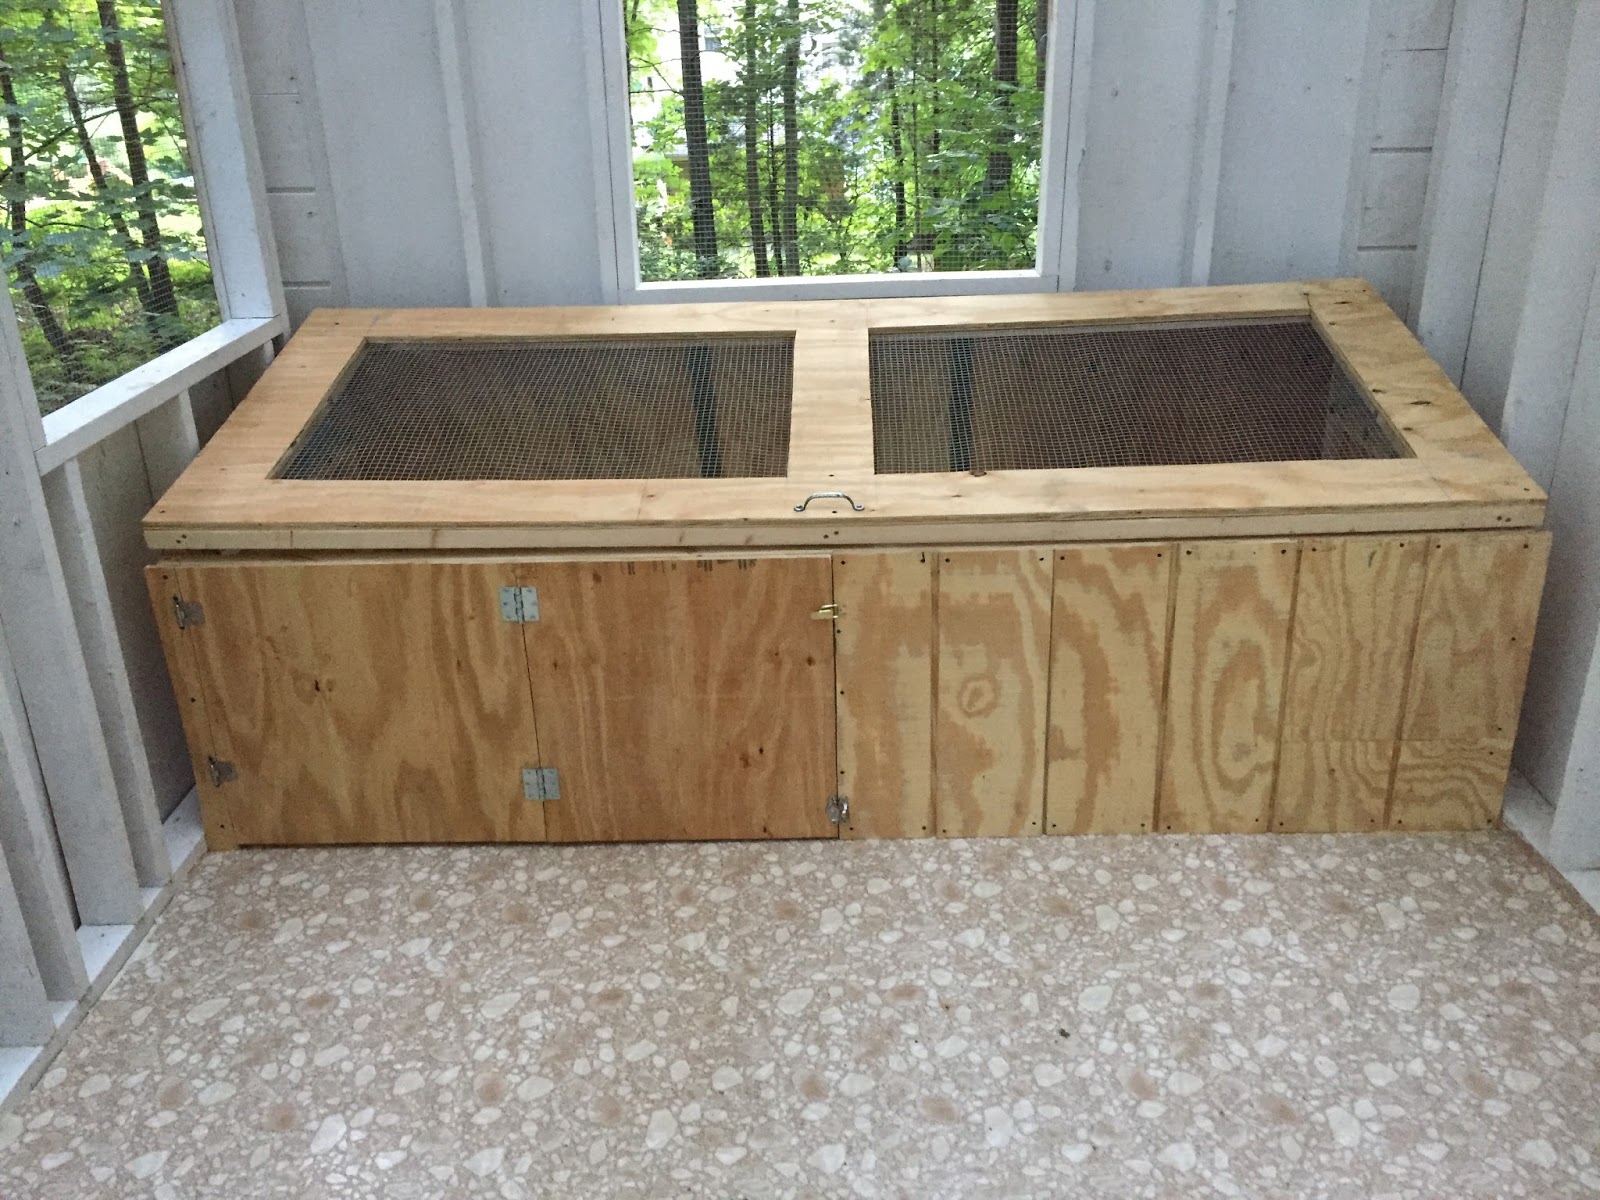
completed brooder
I purchased 2x2s for the frame of the brooder and a sheet of plywood for the lid, but the rest of the wood was from my scrap pile. Leftover pieces of coop siding are on the back, sides, and half of the front of the brooder. The other half of the front is made from the pieces I cut out of the top of the brooder. I wanted more sturdy plywood for the section that can open, so I used that instead of the siding. I also used random 1x2 pieces from my scrap stash to secure the hardware cloth on the lid of the brooder. I used lath/1x2 pieces/not sure what to call these pieces of wood from the stash of wood our neighbor gave us to secure the bottom edges of the hardware cloth attached to the eaves.

scrap wood securing the hardware cloth on the lid, the dark lath on the back wall covers the seams between pieces of siding
I took the hinges and handle from the cooler box- I've been using it as a table for the mitre saw and it's time to take it apart and re-use what I can and burn what I can't. It was made from scrap plywood and it hasn't weathered the years very well. It served its purpose and it's time to move on. The hinges were used on the lid of the brooder along with another set I purchased, and the handle is also on the lid. The two sets of hinges on the front panel and the two locks on the front panel were also in my stash. The brooder was a great stash buster!

the hinges on the front panel allow it to open, which will be handy once the outdoor run is open- we can leave the door open so the chicks will be able to leave the brooder

we can just leave part of the door open if needed
After working hard all week, I finished the brooder enough to move the chicks into it Saturday night. There's no roof on the coop, but since the brooder is a self-contained unit, they're still safe. The only thing left to do is change the front locks (the current ones can't actually be locked in place) and add locks to the lid. The locks I purchased for the lid weren't long enough to attach properly. So cinder blocks are taking the place of locks for now. Redneck, but it works.

the bin looks ridiculously small next to the brooder

I didn't get the chicks into the brooder until 8:30, and it was getting too dark for decent pictures

The cinder blocks to keep critters out- I'm erring on the side of caution and am probably overdoing it, but I'd rather be safe than sorry. And the roof is still missing, so the coop itself is not critter-proof.

Since the windows and roof are missing, I put a tarp over the brooder to keep out the rain. The wood chicken ladder is from our neighbors and will be used when the run is finished.
Though I may actually be manhandling the brooder so it backs against the south wall instead of the west wall. I'm not really thrilled with the idea of putting the door to the run in the north wall, but it's my only option right now. If I move the brooder I can put the door in the west wall, which would be a slightly better location. I think. I'm still deciding....
Getting the chicks out of the house is massive progress and it shouldn't take too long to get the roof panels attached. The run on the other hand, will take more time since I'm digging through rocks and tree roots.

No comments:
Post a Comment